Easy DIY Planter Ladder Living Wall!
Elevate Your Garden With A Living Ladder Wall
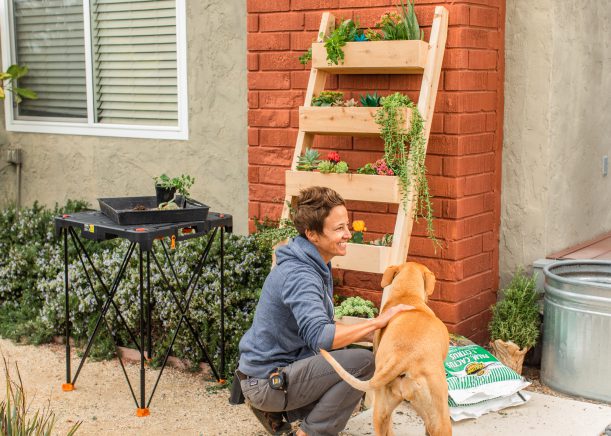
Looking to add some personality to refresh your garden this Spring? This Planter Living Ladder Wall DIY project could be exactly what the garden called for! A Planter Ladder is simple to build, requires minimal materials and results in a beautiful, versatile addition to your garden.
STEPS:

Building the planter boxes
1. Gather materials & necessary Worx tools
2. Cut the end pieces for your planter boxes (2 per planter box for a total of 10). Each side will be cut at a 15 degree angle. Make first 15 degree cut and measure out 5.25″ along the bottom and make your next 15 degree cut the opposite direction, making a \__/ shape. The bottom (short side) will measure 5.25”
3. Cut the sides for the planter boxes (2 per box, total of 10 sides). Cut these to 24”, no angles
4. Make sure the wood boards are dry. Using battery powered brad nailer and wood glue, attach side boards to the outside of the angled end pieces. Repeat for all planter boxes.
5. Cut the bottoms for the planter boxes out of fence pickets (5). Cut to fit inside of each box you have created. Measurements may vary, but should be approximately 22.75” (24” minus 1.25”, the thickness of two pickets)
6. Insert the bottoms in through the top of the boxes and secure in place with glue and brad nails.
7. Add clamps if you have them and for best results, allow the glue to dry for 24 hours.
Building the Side frame

1. The side frames are made from 2×4 cedar. Cut 2×4 boards to desired length depending on how much space is desired between each planter box (recommended 6-8”). In this case, both are cut to 76”. Each end will be cut at 15 degrees and unlike the planter boxes, these 15 degree cuts will be parallel.
2. From the front side of the frame, measure and mark the 2” point. You are going to make a 90 degree cut at this point, so that the frame rests against your wall. Use a straight edge to mark your cut and cut with a circular saw or jig saw against this line.
Attaching the planter boxes to the frame
3. Before attaching your planter boxes to the frame, sand each planter box with an orbital sander to smooth surface for staining or painting.
4. Lay each 2X4 frame piece on its side, angled cuts down, using scrap 2×4 pieces to raise the frame up from the ground (this will allow boxes to be attached at the appropriate place while sitting flat on the ground). Set them approximately 2 feet apart and arrange your planter boxes to desired locations in between frame. Measure and mark on each frame piece so they are even on both sides.
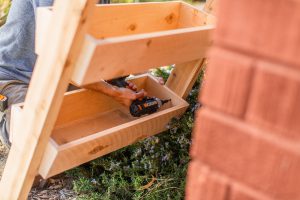
5. Pre-drill two pilot holes through the inside of each planter box into the 2×4 frame and screw boxes into place using 1.5” galvanized screws. The planter boxes can sit flat on the ground and will be attached at that angle.
6. Stand planter up and paint or stain if desired.
7. Add plants to finish off your ladder!
Recommended Materials:
1. (8) 5.5” x 6’ cedar fence pickets
2. (2) 2x4x8 cedar (or regular wood if you’ll be painting it)
3. (1 box) 1.5” galvanized (outdoor) brad nails
4. Wood glue
5. (20) 1.5” screws
6. Plant barrier and soil
7. Variety of herb, vegetable or flower seeds, bulbs or plants
Tools:
1. Pegasus Folding Worx Table (WX051)
2. 20V Power Share Axis Cordless Reciprocating & Jig Saw (WX550L)
3. 20V Power Share ExacTrack 6-1/2″ Circular Saw (WX530L)
4. 20V Power Share Sandeck 5-in-1 Multi-Sander (WX820L)
5. 20V Power Share Switchdriver 2-in-1 Cordless Drill & Driver (WX176L)
6. 20V Brad Nail Gun (WX840L – new product coming soon!)
7. Tape Measure
8. Safety Glasses
Looking to print these directions? Click on the blueprint link below, and remember you can find the tools needed for this project at Worx.com
Worx Living Wall Blueprint


You must be logged in to post a comment.