The Most Clever Cleaning Hacks for a Speedy Deep Clean
Speedy Cleaning Hacks 101
A deep clean isn’t just about satisfaction. It’s also about keeping members of the household healthy, as it can clear away allergens and prevent allergy-related irritation and discomfort.
Getting started is often the biggest challenge of deep cleaning. Despite the frustrating clutter in the closet, the sneeze-inducing dust bunnies, stuck-on grime, the mildew, and the clogged up vents, it can be difficult to find time, energy and motivation.
Sick of spending countless hours deep cleaning? There’s a hack for that! We’ve rounded up the best tips, tricks and products, tapping cleaning experts along the way, so you can get your house in fighting shape for the endless fun of summer that’s just around the corner.

How to Efficiently Clean Out Your Closet
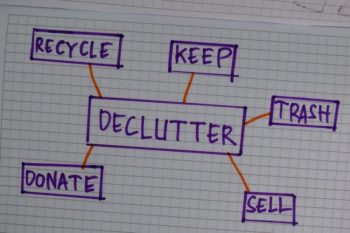
Organizing and decluttering clothes is one of the most time consuming deep cleaning tasks. It’s also one of the most important tasks, as it keeps your closet space functional while saving you time getting ready each day.
“Make your closet more organized with a closet organizer, especially if you have a small closet,” suggests Rick Cerrato, a Franchise Business Consultant for Textile Extraction Xperts (TEX) at Restoration Specialties Franchise Group (RSFG). “This may include rods, shelves, drawers, shoe racks, or even storage for accessories like ties.”
No closet room? No worries! “Consider storing clothes in storage containers or large storage bags,” says Cerrato. “Another option is under-bed storage for shoes and seasonal clothing items not worn daily.”
Be sure what you have in your closet consists of items you love. “Start by laying everything on the bed or floor.”
Cerrato suggests looking at each item piece by piece in your closet and your chest of drawers and ask yourself these questions:
Do I ever wear this? If the answer is no, toss it.
Have I ever worn this? If the answer is no, toss it.
Why did I buy this? If you do not use it, it does not matter, toss it.
Will I ever wear this? If you hesitate at all, toss it.
Try the hanger trick if you can’t decide what to keep or toss. “This is where you simply hang all your clothes with the hanger facing the wrong direction. As you wear each item and go to rehang it, put the hanger going correctly. Over time this will point out all the clothes that you rarely wear so you can toss or donate them.”
Be sure to use quality hangers as well! “Using the correct type of hanger helps maintain the shape of your clothing, reduces wrinkles, and creases, and prevents your clothes from slipping off and falling to the floor. Follow this guide to find the best hangers for your closet.”
Finally, consider arranging clothes by style, color or season. “One of the biggest benefits of this is the ease of finding clothes and outfits faster saving time in the morning,” says Cerrato.

How to Keep Your Dryer Vent Clean and Safe
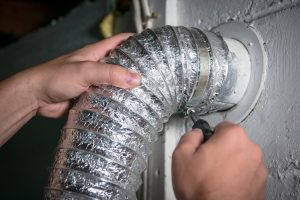
Deep cleaning is about tackling the spots in your home neglected during weekly cleans. Cleaning the dryer vent is definitely one of the most overlooked! “Dryer fires occur approximately every 34 minutes. So cleaning your dryer vent isn’t a light cleaning task to take on by yourself,” notes Scott Thomas, director of systems for Dryer Vent Wizard, a Neighborly company.
“The safest and fastest way to have your dryer vent cleaned properly is by a professional to make sure it is safe and up to code,” says Thomas. However, if you plan on attempting to clean it out yourself, consider these tips from Thomas:
● Never use chemicals while cleaning your dryer. Since the dryer produces consistent heat, using a flammable chemical can increase your chances of a dryer fire incident.
● Cleaning methods vary greatly and depend on how your dryer vent is structured, but you can count on a brush or vacuum attachment to assist in getting the grime out for a safer home.
● The most simple habit that helps prevent a dryer fire is to clean out your lint trap regularly, so lint build up doesn’t escape into the dryer vent. If this happens, a decrease in ventilation can cause longer dryer times and an increase in potential for a dryer fire.
● Dryer sheets can contribute to a dryer fire, as well. If you use them, it is important to deep clean the lint trap every few months. To do this, you can wash your lint screen with hot soapy water and an old toothbrush to get rid of dryer sheets’ waxy buildup.

Tackle the Backyard
In preparation for the summer months, and all the mosquitoes that come with it, deep clean your yard! “Mosquitoes thrive in shady areas like bushes and shrubs. They stay cool on the undersides of leafy foliage. Ticks rest on tall grasses while they wait for a host,” says David Price ACE, Associate Certified Entomologist, Technical Director at Mosquito Joe, a Neighborly company. “By keeping your lawn and greenery maintained, mosquitoes and ticks are less likely to hang around your yard.”
A quick way to clean and eliminate mosquitoes is to toss out sneaky standing water. “Remove standing water in children’s toys, bird baths, garbage bins and flower pots,” advises Price. “Mosquitoes can breed in just a bottle cap full of water. By removing standing water from around your home, you minimize the places where female mosquitoes can lay their eggs. Here’s how to make it a game for your kids.”
Be sure to remove the layer of grime accumulated in the backyard with a leaf blower. The WORX 20V Power Share Leafjet Blower can also be used to clear out grass clippings from the sidewalk, driveway and patio, along with dust from the garage and entryway to the house.

Tips for Cleaning Light Fixtures & Ceiling Fans
Just because dust settles out of sight doesn’t mean you shouldn’t clean it! Deep cleaning should include tackling light fixtures and ceiling fans. “Accumulated dust, dead bugs, and other grime cloud light bulbs, coverings and fixtures, diminishing light flow,” explains Josh McCormick, VP Operations at Mr. Electric, a Neighborly company. “And when the temps go up, and ceiling fans turn on, built up dust and cobwebs on the blades can lead to problems like noisy fan operation, motor damage or poor indoor air quality. Knowing the best way to clean light fixtures, screens and ceiling fans without breaking or damaging them is essential to a brightly lit and cooled home.”
McCormick suggests these tips for cleaning basic light fixtures:
● Turn off all lights that you plan to clean, and allow at least 30 minutes for bulbs to completely cool. Before touching light bulbs, place your hand near the bulb to see if it’s still emitting heat.
● Using an electrostatic duster or microfiber cloth, gently sweep or wipe bulbs, covers, and fixtures to remove surface dust.
● Fill a dish pan or a sink with warm water and a small amount of mild dish soap.
● Remove globes or light covers (most are held in by clips or thumb screws) by using one hand to securely grasp the globe while using your other hand to unclamp or unscrew. Be sure to maintain a firm grip as you remove the last screw or clip! Dump any loose debris in the trash.
● Soak globes/covers in soapy water for 5-10 minutes. While they are soaking, unscrew light bulbs and gently wipe with cleaning solution and cloth. Allow to dry before replacing into fixtures.
*Note: Avoid applying too much pressure when unscrewing light bulbs. If bulbs are screwed in tightly, wear a textured work glove to provide more friction and protect your hand if it breaks.
● Dampen a microfiber cloth with cleaner and wipe fixtures, including toggles or switches. Avoid spraying solution directly on the fixtures.
● Use a cloth to gently scrub any remaining grime from globes/covers, then rinse with fresh water and carefully towel dry with microfiber cloth before replacing.
*Remember, recessed or flush-mounted ceiling lights, brass fixtures and ornate chandeliers, etc. may require specific cleaning products and techniques.
McCormick suggests these tips for cleaning ceiling fans:
● Always turn off the ceiling fan before you start any cleaning method. Make sure the blades come to a complete stop.
● Use a pole duster that slides over the fan blade to clean the top and bottom of each blade at the same time.
● As you clean, avoid putting too much pressure on the blades to prevent warping or breaking.
● For a deeper clean, climb up a step ladder and clean the blades by-hand with a lightly dampened microfiber cloth. Follow with a dry cloth to remove excess moisture.
● Use a clean cloth to wipe dirt from the motor housing and any pull chains.
● Consider using a microfiber cloth sprayed with an anti-static, dust-repellent product to wipe down the clean blades, or go over each blade with an unused dryer sheet. This extra step may allow you to go longer between cleanings because the dust will be less likely to cling to the blades.
Washing Your Home’s Exterior
Washing the home’s exterior will revive curb appeal following the wild elements of the colder months. WORX offers the 20V Power Share 4.0 Ah Hydroshot Portable Power Cleaner that’s perfect for tackling the grime left behind. Hydroshot is great for washing cars, bikes, patio furniture, windows and more. Unlike a pressure washer, it’s battery powered and draws water from a garden hose and fresh water through its 20′ accessory hose, which can draw water from a lake, river or bucket. It can even be used indoors in a shower stall drawing water from a bucket. The WORX Hydroshot can also be used for cleaning windows and sliding door tracks.
The WORX 1600 PSI Pressure Washer is ideal for those seeking more power. It’s electric and very efficient. Its high-pressure rating can tackle tough cleaning jobs like concrete, brick and masonry, while the multiple nozzles make it suitable for deep cleaning everything from vehicle to windows.
General Tips for Saving Time While Cleaning
Molly Maid offers a number of helpful resources for saving time while cleaning. Below, Vera Peterson, President of Molly Maid, a Neighborly Company, shares some of the brand’s favorite general tips:
1. Set a timer for a 15-minute burst of cleaning. One of the easiest ways to save time while cleaning is to do a little decluttering every day. Spending just 10 to 15 minutes a day to tidy up really can save you a lot of time and grief on big cleaning days. Have a designated location for everything; this can increase your productivity when you’re cleaning.
2. Start from the top, and work your way down. Gravity affects everything, even household dust. Save the floors for last. Otherwise, you’ll knock dust onto the floors and have to clean them twice.
3. Clean as you go. This is a tried-and-true way to save time when cleaning, especially when it comes to your kitchen and bathroom. While cooking, be sure to wipe surfaces as you go and place prep utensils and bowls in the sink. Clean spills on your stovetop as they happen so you can prevent crusted-on stains. Similarly, be sure to wipe away any soap scum or toothpaste on your bathroom sink daily. Keep basic cleaning supplies in buckets throughout your home for easy access. It will help you build good habits.


You must be logged in to post a comment.