Intermediate
DIY Mini Tree Décor with Wood Burned Ornament

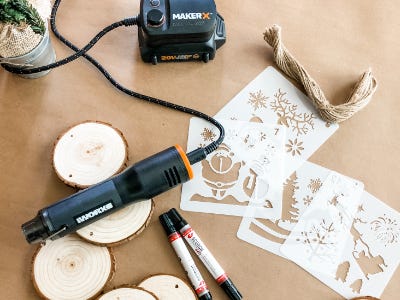
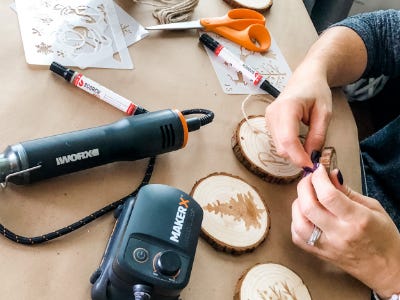
Supplies
- Maker X Heat Gun
- Mini Trees (I used 18” wrapped in burlap at the bottom for a more rustic look)
- Small Galvanized buckets
- Raw Wood Slices
- Stencils
- Scorch Marker
- Twine
- Scissors
- White Fairy Lights (don't forget the batteries!)
Step-by-Step Instructions
Steps
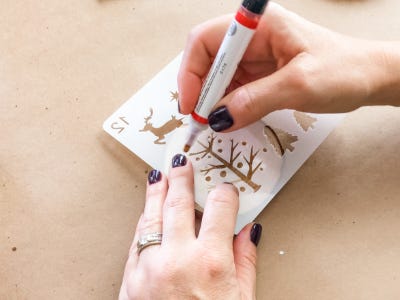
1. Start by choosing which stencil you would like to use. We got a pack of holiday stencils from Amazon and chose 5 coordinating styles for this project.
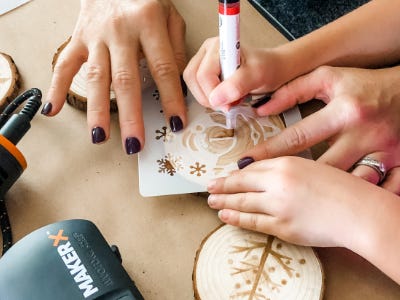
2. Select wood slices that are similar in size.
3. Place the stencil onto the wood slice.
4. Prime your Scorch Marker by following instructions on the package.
5. Trace your stencil with the Scorch Marker until it is all filled in.
6. Use the MAKERX Heat Gun tool to heat the stenciled wood slice until the “wood burned” effect is achieved.
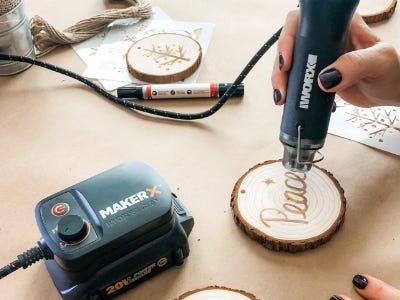
7. Repeat on the other slices. We used 5 for this project but you can make as many as you want!
8. Fluff your trees and place them into galvanized buckets.
9. Wrap the fairy lights around the trees.
10. Cut twine big enough to tie the ornament around the bottom of the tree.
11. Secure each ornament to the bottom part of the tree by wrapping twine around and tying. (we used pre-drilled wood slices but you can easily drill your own holes with the MAKERX Rotary Tool Attachment!)

12. Arrange your trees into a FABULOUS Holiday display and ENJOY!