Beginner
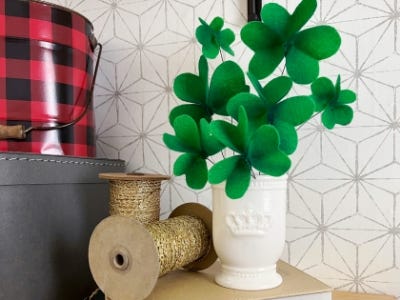
St. Patrick's Day Felt Clover Bouquet
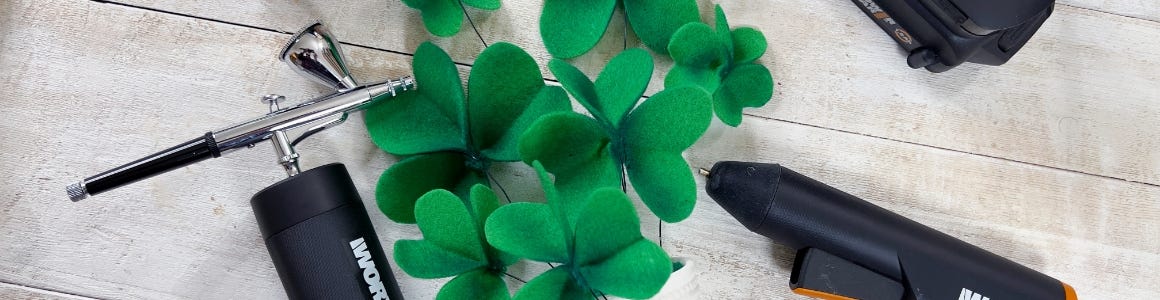
Supplies
- WX739L - 20V MAKERX Rotary Tool
- WX742L.9 - 20V MAKERX Air Brush
- WX746L.9 - 20V MAKERX Glue Gun
-
Green Felt
-
Floral Wire
-
Green Airbrush Paint
-
Floral Foam
-
Vase
Step-by-Step Instructions
Steps
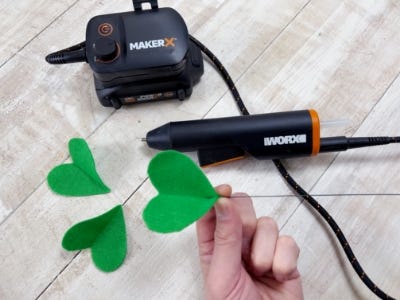
1. Each clover needs three hearts. Cut out a heart on a piece of cardstock to use as a template. Fold a piece of felt and trace half the heart template on the fold. Use the rotary tool to cut out the heats. Continue to cut as many hearts as needed. Tip: Cut out different sized hearts for a variety of clovers.


2. Use the glue gun to add a bit of hot glue to the bottom tip of the first heart. Place a piece of floral wire on top of the glue and squeeze the tip. Add glue to the tips of the other two hearts and squeeze them as well. Glue the two hearts to either side of the first heart. Repeat this process until all the clovers are completed.

3. Load the paint reservoir of the airbrush approximately ⅓ full with green airbrush paint. Before airbrushing on the clovers, test and practice on a scrap piece paper. Hold each clover by the floral wire and airbrush the dark green in the center of the clover and on the tips. You don’t need to add too much paint, doing this really takes the clovers to the next level.
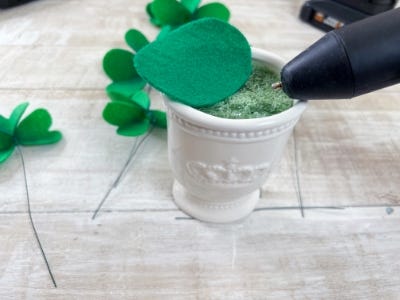
4. Press the floral foam into the vase. Using the rotary tool, cut a piece of green felt to size to mask the foam. Use the glue gun to glue the felt into place. Carefully press each clover into the floral foam in different heights and spots. Tip: If you have trouble getting the floral wire through the felt, use a pair of scissors to puncture it through before adding the clover.