Beginner
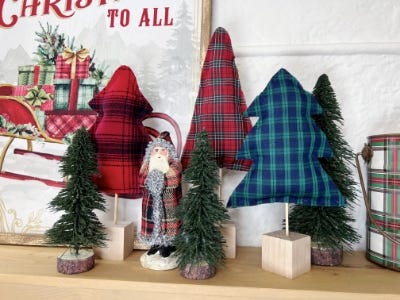
Upcycled Flannel Plush Christmas Trees

Supplies
-
- Scraps of Plaid or Flannel Fabric
- Skewers or Sticks
- Wood Blocks
- Stuffing or Batting
Step-by-Step Instructions
Steps
1. Fold a piece of fabric in half and then fold it again. Hold the fabric together and use the Rotary Cutter to cut the shape of your tree. Once cut, you should have two cut trees. Tip: Keep the shapes of the trees simple and use a piece of chalk to draw on your tree.


2. Glue the two pieces of fabric together with the glue gun. Start at the top of the tree and add a consistent line of glue along the cut edge. Place the second piece of fabric on top and press them with your fingers. Continue around the tree leaving the bottom open. Tip: It’s best to work in small sections, before the hot glue cools.

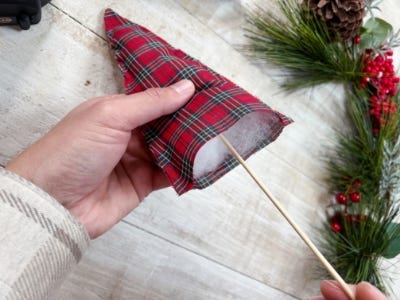
3. Pull apart the batting in small pieces and begin to stuff the tree. Use the skewer to help push the batting into the top and smaller areas.

4. Finish the tree by sticking the skewer into the center of the tree and glue the bottom seam shut. Cut the skewer down to the size you want it to be.

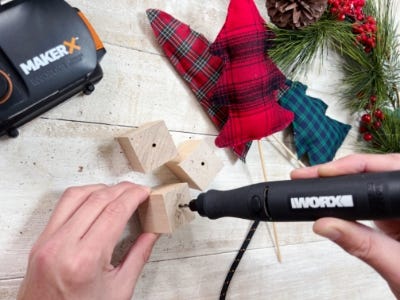
5. Drill a hold into the center of a wood block with the Rotary Tool. Place the skewer into the drilled hole. If the hole feels a little loose, add a bit of hot glue to the tip of the skewer before adding it to the hole. Make multiple ones and add them to your holiday decor!