Intermediate
Wood Burned Watercolor Easter Eggs
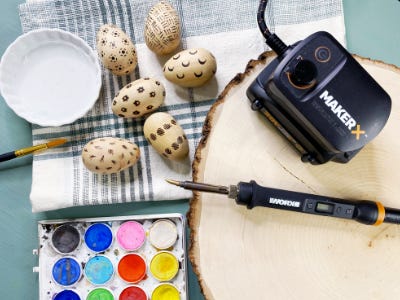
Supplies
- Wood Eggs
- Heavy Duty Glove
- Watercolor Paint
- Paint Brushes
- Skewers
Step-by-Step Instructions
Special Note:
*Get familiar with the wood burning tool - Practice on an extra wood egg to get familiar with working on a rounded surface. Hold the tool like a pen or pencil, try different tips and test the temperature you like working with best.
Steps
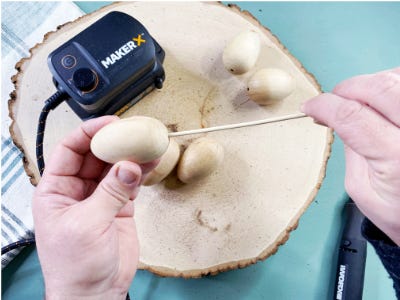
1. Optional: Attach the drill bit to the rotary tool and drill a 1’’ hole directly on the bottom of the egg. Add a skewer or dowel into the hole to help hold the egg while painting and or wood burning.
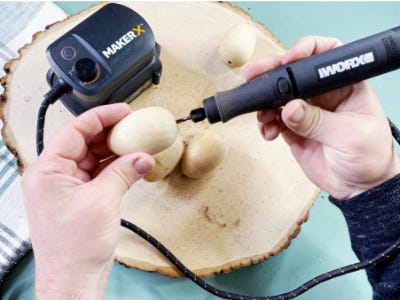
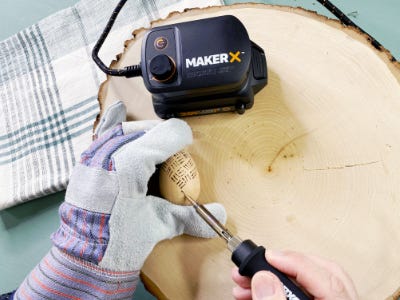
2. Remove the rotary tool from the hub and attach the wood burning tool with the fine tip. Turn on the wood burning tool and allow it to heat up until maximum temperature is reached. Tip: Test the temperature of the wood burning tool on a practice egg. The temperature needed will depend on the type of wood.

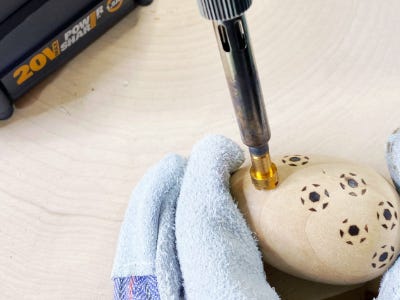
3. Wear a heat resistant glove for safety and use even pressure while creating your design. Simple repeating patterns are a great way to start. Tip: Turn the egg as you work instead of twisting the wood burning tool.
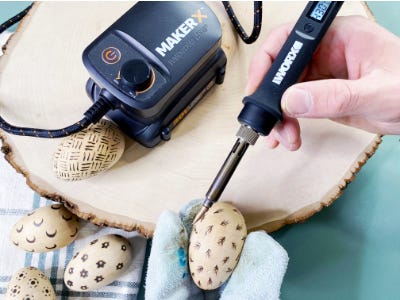
4. Allow the wood burning tool to cool and switch the fine attachment to one of the stamp attachments. Once fully heated press the stamp onto the egg for about five seconds. Tip: Because the egg is rounded it can be tricky to get the full image onto the surface. While keeping the stamp on the egg, rock the wood burning tool in different directions to help burn the whole image.
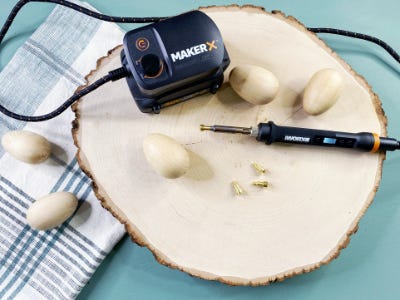
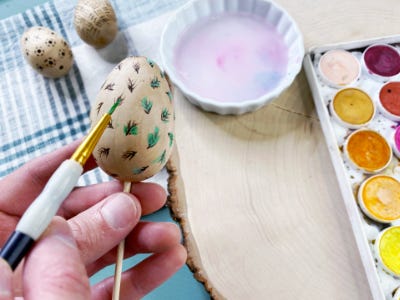
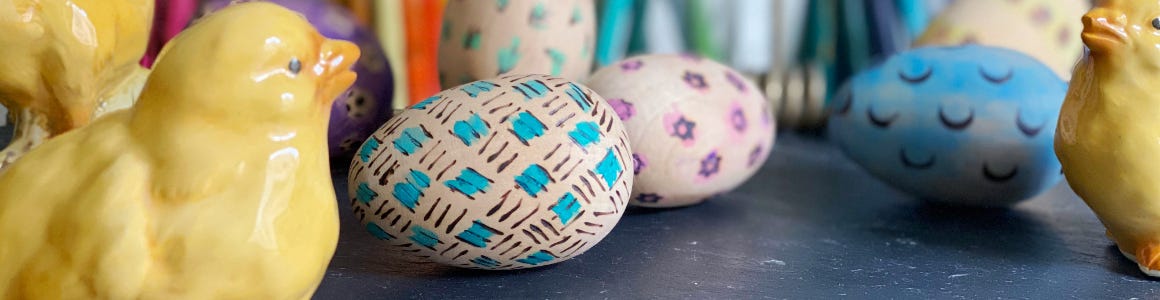
5. Add pops of color by adding watercolor to the eggs. Paint small details on top of the wood burned patterns or paint the whole egg.