Intermediate
Woodland Birch Log Gnome

Supplies
- Birch Wood Craft Log
- Chunky Yarn
- Felt
- Wooden Bead
Step-by-Step Instructions
Tool Tip
Get familiar with the wood burning tool - Practice on an extra piece of scrap wood. Hold the tool like a pen or pencil and try different tips while testing the temperature you like working with best.
Steps
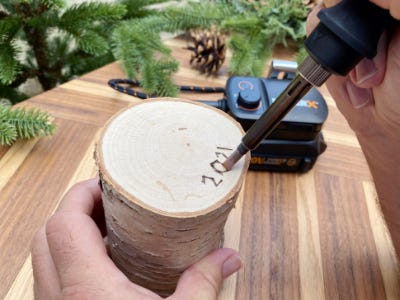
1. Use the wood burning tool to personalize the bottom of the tree stump. Add the date or a special message.

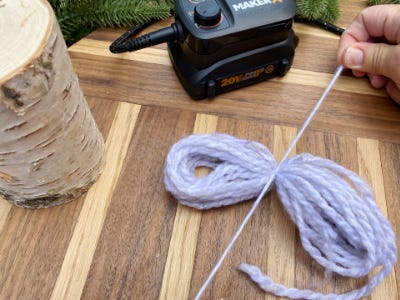
2. Use the rotary cutter to cut a long piece of yarn. Wrap the yarn around 4 of your fingers about 15 times. Carefully pull off your fingers and cut a smaller piece of yarn and tie it around the center of the whole loop. Cut the two loops to create the beard. Give the “beard” added texture by rubbing the yarn together with your two fingers and pulling the strands apart.

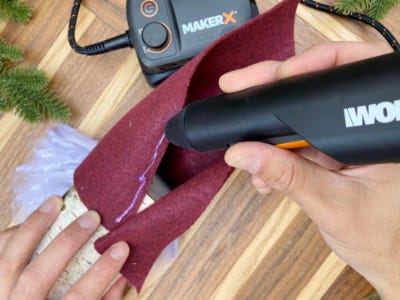
3. Hold a piece of felt vertically and use the rotary cutter to cut a rounded edge from the bottom corner to the top corner.

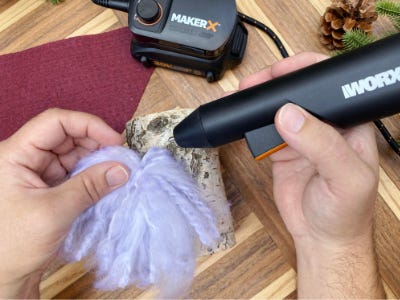
4. Start to put the gnome together by adding a bit of hot glue to the center of the log and pressing the beard to it. Add glue to the back of the hat and place it on top of the log above the beard. Lift the hat and glue the bead to the top of the beard for a nose.

5. Glue on any additional festive flourishes and give the beard a trim if needed. There’s gnome place like home for the holidays!