Beginner
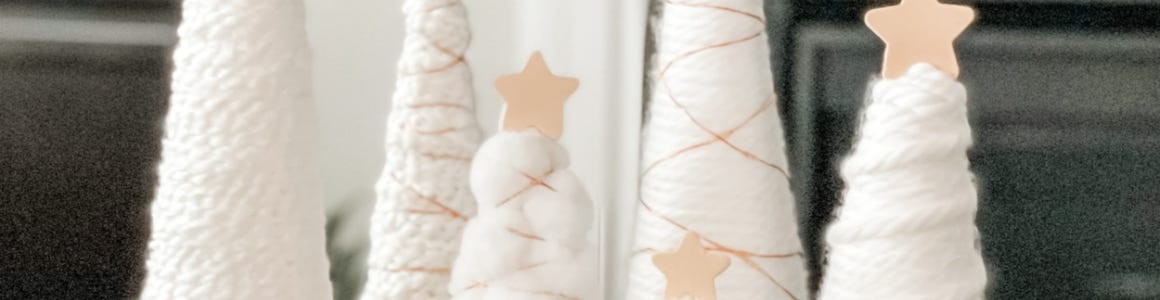
Yarn Wrapped Holiday Trees
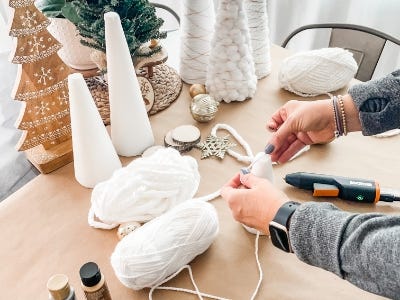
Supplies
- MAKERX Rotary Tool (WX739L)
- MAKERX Hot Glue Gun (WX746L.9)
-
Yarn of various textures and sizes (we used all white but you can use any color combination here)
-
Paper Mache Cones in alternating sizes and/or styrofoam cones
-
Wooden Stars
-
Skewers
-
Small sticks/branches
-
Fairy Lights (optional)
-
Natural Wood Slices
-
Scissors
Step-by-Step Instructions
Steps
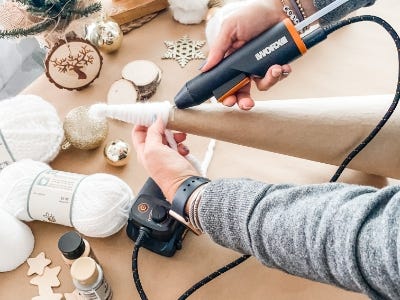
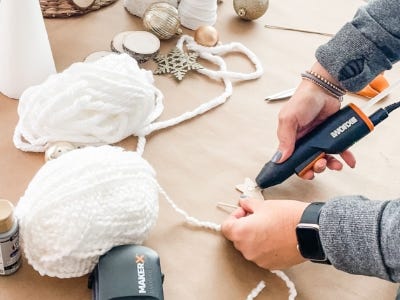
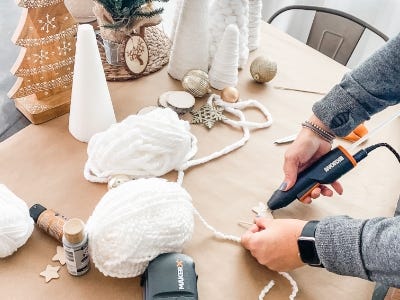
1. Starting with the papier mache cones, decide which yarn you want to use on the first tree and unravel the starter piece. (if only making styrofoam trees, skip to step 7) Then, power up the MakerX glue gun and add a dab of glue right to the tip of the cone.


2. Attach the end of the yarn to the glue at the top of the cone and begin to wrap it around the cone, stopping every few rounds to add another dab of hot glue.
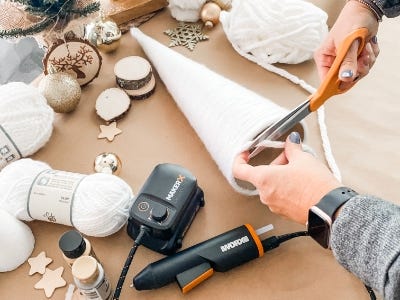
3. Continue wrapping all the way down the cone until all spaces are covered and trim the end. Secure that piece to the bottom edge with another bit of hot glue.

4. Once the tree is wrapped, select a wooden star and add some hot glue to the back of it, then secure it to the top of your tree.

5. If using the fairy lights, add a little dab of glue to the inside bottom of the cone and secure the cord of the lights to your tree. Now, wrap the lights around the tree and secure at the bottom with another dab of glue. Then, add some batteries and tuck the battery pack right inside the bottom of the tree.


6. Repeat these steps with the other 2 trees and then light them up!

7. For the styrofoam trees, begin with steps 1-3 above.

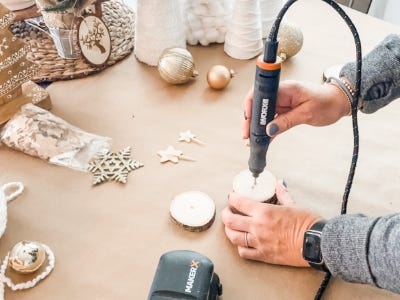
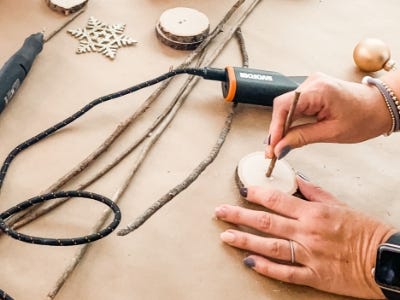
8. Since these cones have a flat top, we attached the stars by adding some hot glue to the back of the star and attaching a small wooden skewer or toothpick.
9. Once the glue has set, carefully press the skewer into the top of the tree until the bottom of the star rests on the yarn.

10. Now, grab the MakerX rotary tool and attach the drill bit. Carefully drill a hole into the center of each wood slice, creating a base for the tree “trunk.”

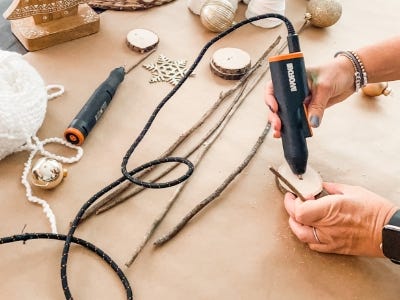
11. For the next step, my girls and I went on a little hike behind our house to hunt for sticks. We wanted them to be strong but small enough to fit into the drilled holes. A stained dowel would also work here but we like the natural texture of the branches.
12. Once you have collected your sticks, cut them down to about 4-5 inches and check to see if they fit into the pre-drilled hole. We had to drill a little more in some of ours to make a nice snug fit. Add a dab of hot glue to the hole and insert the stick.
13. After the glue has set, carefully insert the stick into the bottom center of the styrofoam tree.

14. Repeat with the other trees and voila! You have a simple and elegant addition to your holiday decor!
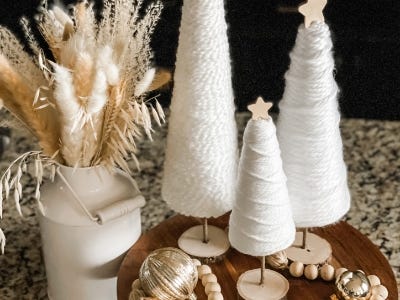

15. Style them with or without lights, bundle them together or line them up as a stunning centerpiece.