Beginner
Airbrushed Conversation Heart Garland

Supplies
- Cutting Machine (Cricut)
- 5 Small Wooden Hearts
- Airbrush paint
- Painters Tape
- Stencil Vinyl
- Twine or String
Step-by-Step Instructions
Steps
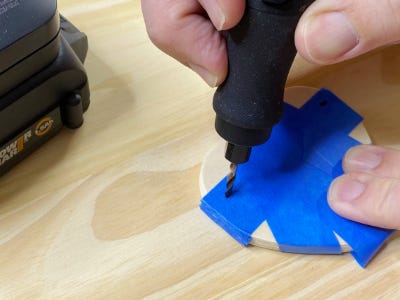
1. Stack and tape all the wooden hearts together with painters tape. Mark two holes towards the top of the heart about a half inch from the edge. Tip: The painters tape will help prevent splintering while drilling.
2. Add the drill bit to the rotary tool and turn on the MAKERX hub while holding onto the base of the tool. Drill straight down through the marked spots until all the way through each heart. Remove the painters tape and sand any rough pieces if needed.

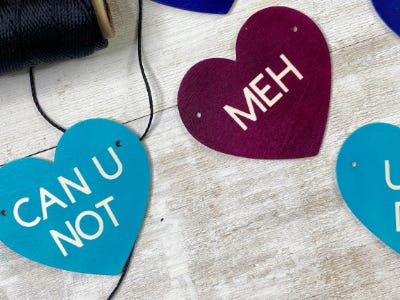
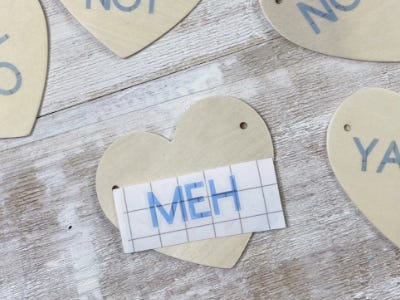
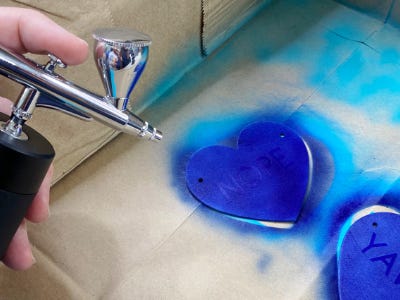
3. Use a cutting machine to cut out different simple sarcastic sayings for each heart, weed the stencil vinyl around the letters, to use as a reverse stencil. Use transfer tape to place the phrases on each heart, making sure each letter is pressed down well. Tip: No cutting machine? No problem! Use pre-cut vinyl letters or a stencil
4. Separate the hearts into the colors you’d like to paint them. Load the paint reservoir of the airbrush approximately ⅓ full with the first color of airbrush paint. Before airbrushing, test and practice on a scrap piece paper. Tip: Cut a paper bag in half to cover your surface, the sides of the bag make great walls to catch any paint.

5. Begin painting the first set of hearts in a consistent swirling motion about four to six inches away from each heart. Keep spraying until happy with the look and color and carefully set them to dry.
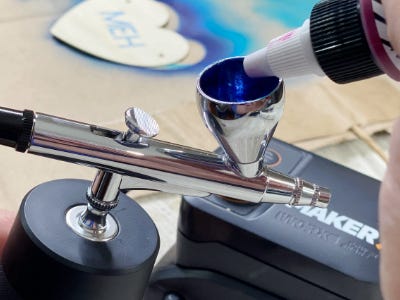
6. Empty out the remaining paint and add the new paint color into the reservoir. Spray it on a piece of scrap paper until the paint fully turns from the first color to the second and begin to spray the next set of hearts. Repeat this process until all the hearts are painted.
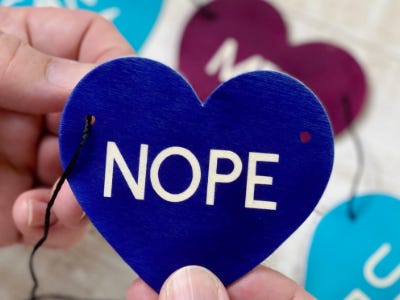
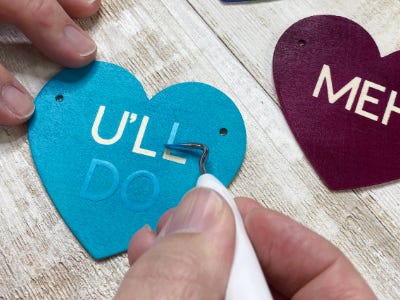
7. Once the hearts are completely dry, peel off the letters to reveal the sayings on the raw wood.
8. Cut a long piece of string and thread through the holes. Evenly space out each heart and hang.