Beginner
Easter Egg Piñata DIY
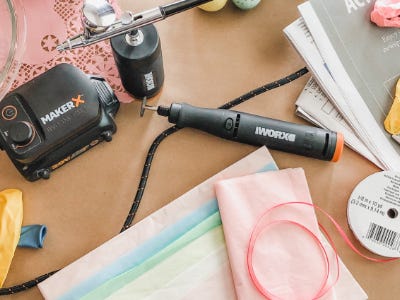
Supplies
- Worx ZipSnip and/or Scissors
- Butcher Paper (to cover surfaces)
- Balloons
- Mixing Bowl and Measuring cups
- Spoon or Whisk
- Flour
- Water
- Salt
- Microwave
- Newspaper
- Ribbon or Twine (we used both)
- Acrylic or Airbrush Paint
- Paintbrushes
- Tissue Paper (we used Pastel Colors to create Easter Egg look but you can choose any colors you like)
- Quick Dry Tacky Glue
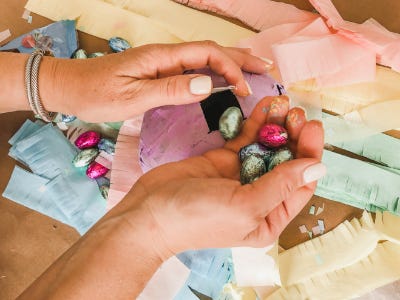
- Wrapped Easter Candy (optional)
Step-by-Step Instructions
Steps
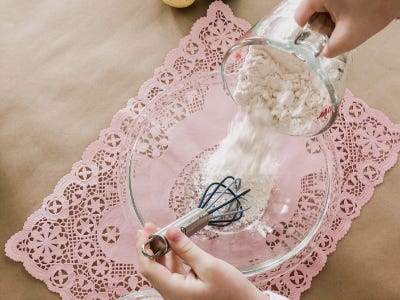
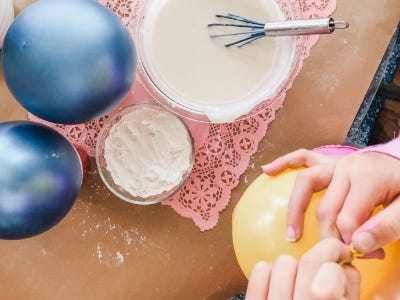
1. Spread butcher paper or cardboard over your work surface and gather the mixing bowl, measuring cups, whisk, flour, water and salt.
2. Measure 1 part flour to 2 parts water and add to the mixing bowl (we used 1 cup of flour and 2 cups of water which made enough paper mache paste for 5 ”eggs”). Add a tablespoon of salt (to keep the paste from molding over time) and mix thoroughly, removing any lumps.
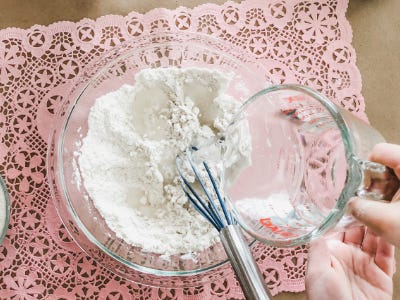
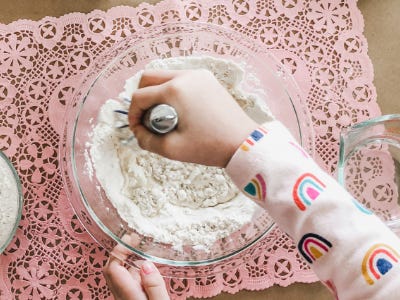
3. Microwave the mixture for about 30-40 seconds. Remove from the microwave and stir. Then repeat the process a few more times until the paste begins to thicken. It should be the consistency of a creamy soup or bisque.
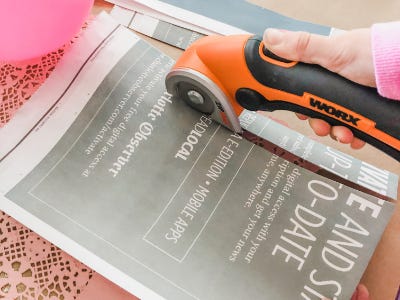
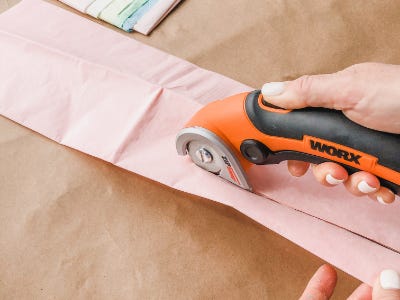
4. Then, collect your newspaper and cut it into strips. Our Worx Tools Zip Snips were perfect for this! (Regular scissors will get the job done too.)
5. Blow up each balloon until they are approximately 6-10 inches long vertically and oval shaped. (If they are still round it’s OK! They will form an egg shape when they hang to dry.)
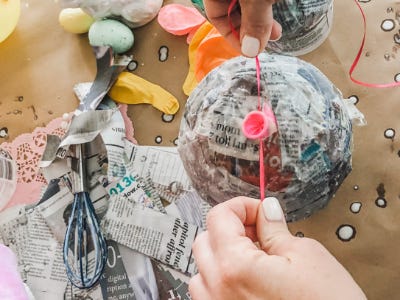
6. Carefully dip the newspaper strips into the paste and remove any excess with your fingers. (My girls absolutely LOVED this part and honestly, so did I. I forgot how much fun paper mache can be!)
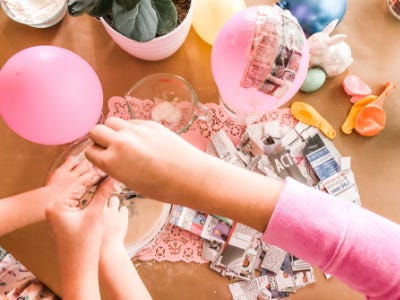
7. Place the dampened strips onto the balloon in a criss crossing pattern. We set our balloons in short plastic cheese containers (Reduce, Re-Use, Recycle!) to hold them still for us while we worked.
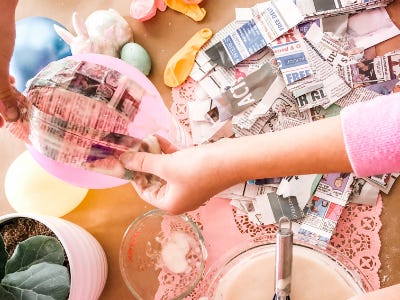
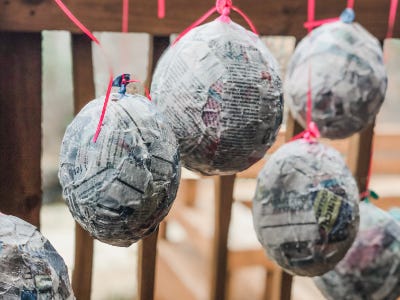
8. Continue layering the strips of newspaper onto the balloons until they are completely covered, minus the top of the balloon and tie.
9. Then, tie some ribbon or twine around the knot at the top of the balloon and hang from a stick or hook to dry. We let ours dry overnight to make sure they were completely hardened.
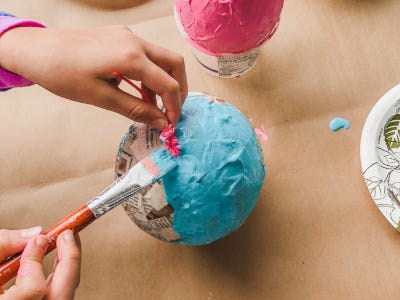
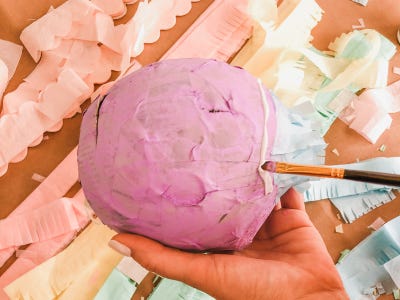
10. Using acrylic paints or the MAKERX Airbrush tool, apply a light coat of paint to each egg. The tissue paper will likely cover most of the egg in the next step so it doesn’t have to be perfect!
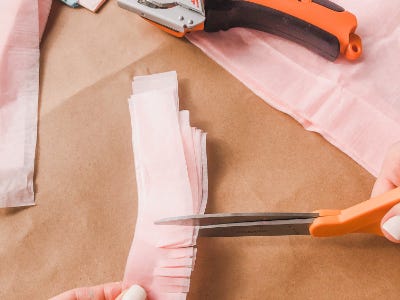
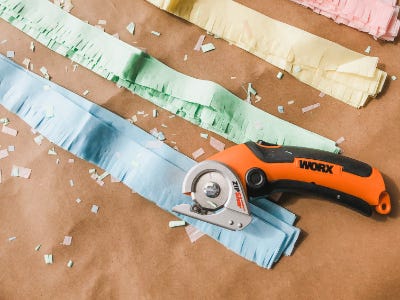
11. While the paint is drying, cut the tissue paper into strips. (approximately 1-1.5 inches wide) Once again, the Zip Snips made this process a breeze!
12. Then, cut the strips about halfway through to create a fringe. Repeat this with all of the tissue paper colors and set them aside.
13. Once the paint has dried and the eggs have hardened again, pop the balloons and carefully remove them through the hole in the top of the paper mache.
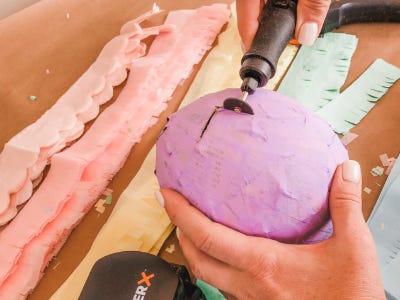
14. Next, attach the cut off wheel to the MAKERX Rotary Tool and turn it on with the Hub. Carefully make three slices into the egg creating a door or flap. (this is where you will fill the piñata with treats. If you are making these for decoration only, you can skip this step.)
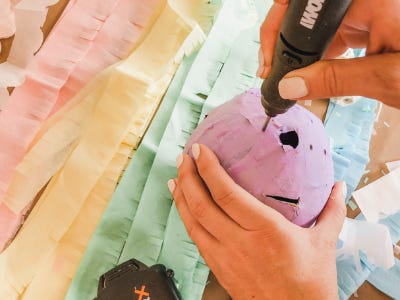
15. Now, switch out the cut off wheel with the drill bit attachment on your MAKERX Rotary Tool and drill 2 holes in the top of your egg on either side of the hole where the balloon tie was.
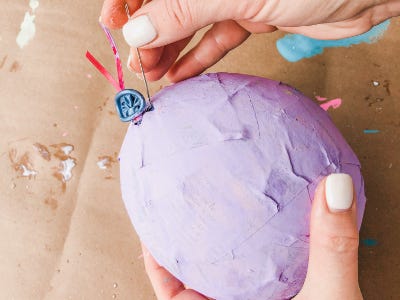
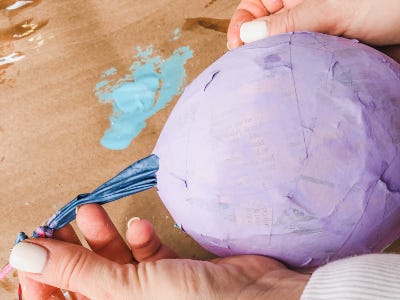
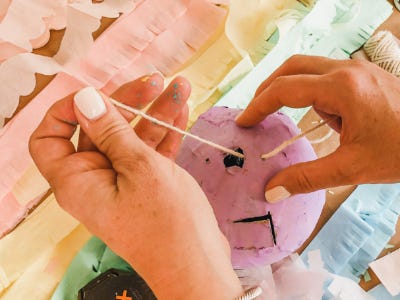
16. Using your twine, thread it through both holes from the outside in and then tie a knot. Once the knot is secure, pull the twine from the other side until the knot disappears inside of the egg.
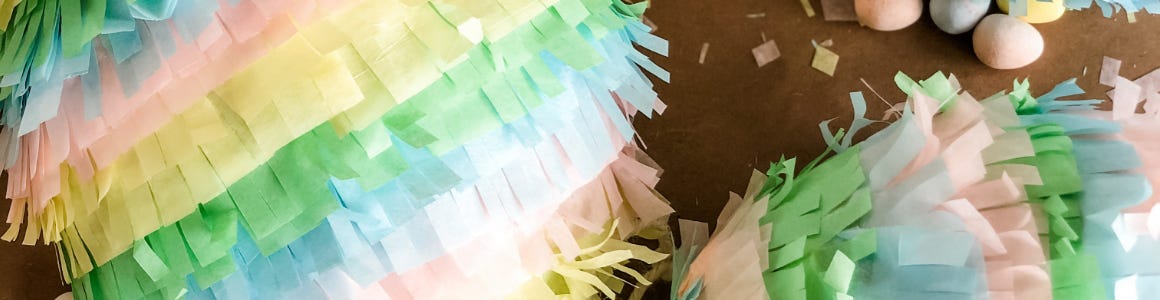
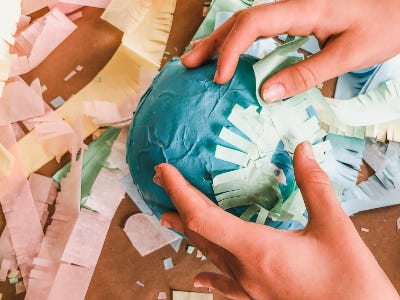
17. Apply some Tacky Glue to the bottom of your first egg and smooth with a paintbrush. Apply small pieces of the tissue paper fringe to the glue and continue in a circular motion around the egg. (make sure you glue the solid part of the strip to the egg and leave the fringe pieces out)
Pro Tip: Choose a “front” side for your egg and only start a new section or overlap tissue paper in the back.
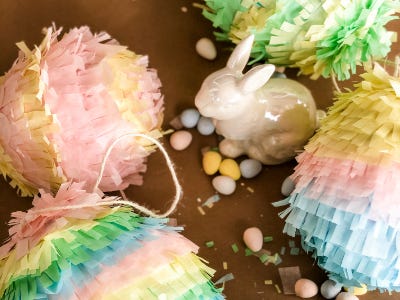
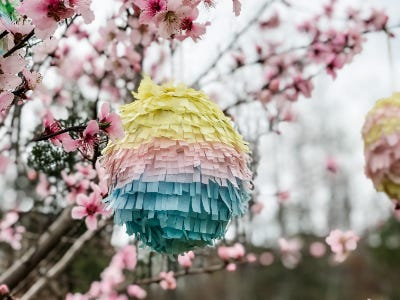
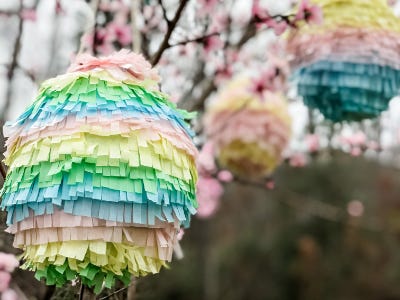
18. Keep gluing and wrapping the tissue paper fringe to your egg creating a pattern and working from the bottom to the top. Get creative here! Use different color stripes and layers of fringe to create that perfect ‘Easter Egg’ look.
19. That’s it! Hang them up and admire the adorably festive vibe they bring. (I told my girls we could crack them open on Easter Morning. What a fun surprise! I think we may have a new Easter tradition in our house.)