Intermediate
Fall Faux Book Stack DIY

Supplies
- 1 2x6x8 Pine Board
- Measuring tape
- Pencil
- White Acrylic Paint
- Paintbrush
- Wood Glue
- Cricut Vinyl Stencils or Large Font Typewriter Stamps and Black Ink
- Black Airbrush Paint
- Painters Tape
- Jute Twine and/or Tassels
- Decorative Ribbon (optional)
- Wood Beads (16-20mm)
- Scissors
Step-by-Step Instructions
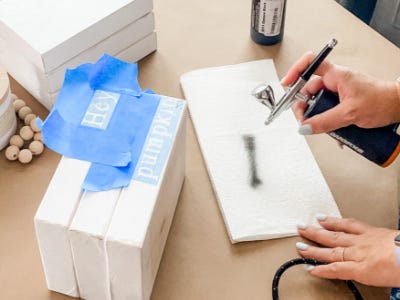
Tool Tip
When using the MAKERX Air Brush, it’s always good to test your spray on a paper towel before applying it to your piece. This allows you to make any adjustments before you start.
Steps
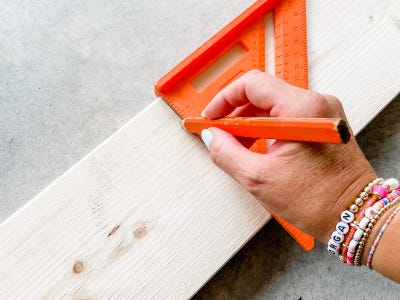
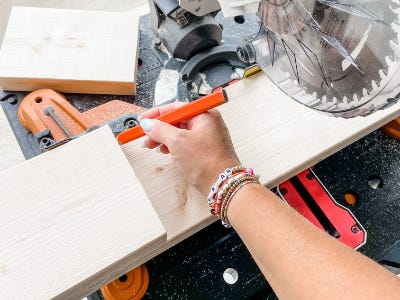
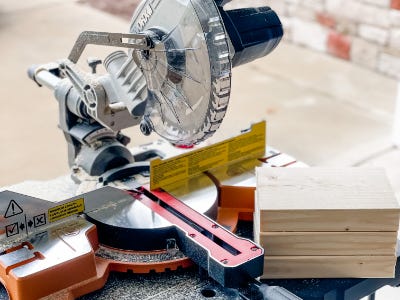
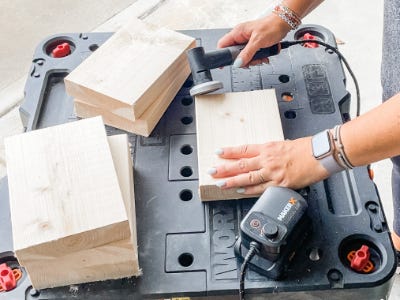
1. For this project we started by measuring out our pine board into 8” sections and marking them clearly. We got a full 12 “books” out of the one board so we were able to make 4 book stacks of 3 books each.
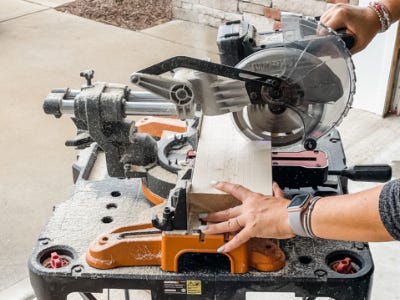
2. Then, we fired up our Worx Tools Compound Miter Saw and cut each section, double checking our measurements with each cut.
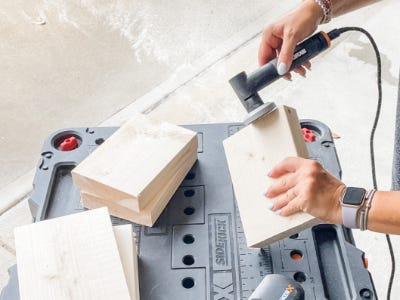
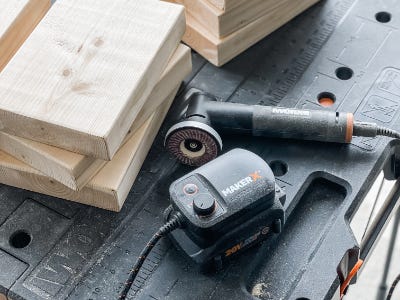
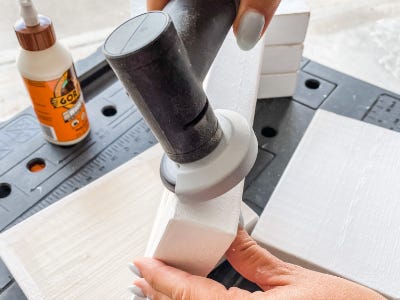
3. Once all of the pieces have been cut, power up the angle grinder with the sanding disc attachment and sand down the edges of each “book” to create a rounded and smooth look.
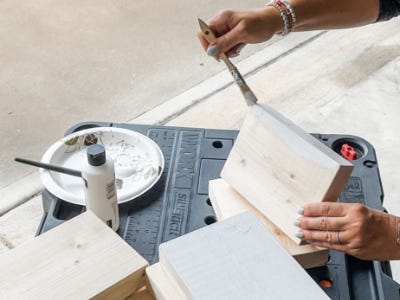
4. Next, wipe off any excess sawdust from the wood and grab your acrylic paint and paintbrush. Paint the “books” all around the edges and on the top of one for each stack. Continue until all are painted and dried and then apply a second coat.
5. Now take the angle grinder again and sand around the edges to create a weathered, rustic look. Stack them up as you go to see how they are looking and to know where they need more sanding.
6. After they have all been distressed to your liking, wipe them down once more and decide which “books” stack well together.
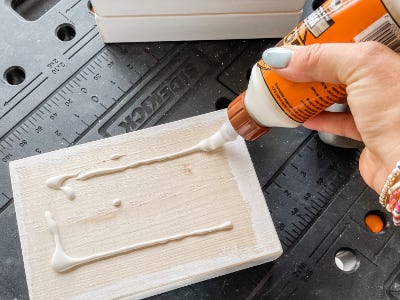
7. Grabbing the wood glue, start with the bottom and glue each “book” together, creating stacks of three. You can secure them at the end by adding a weight. This helps ensure a tight bond.

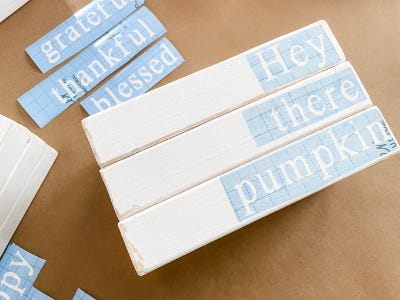
8. If you are cutting vinyl stencils, now would be the time to design your sayings, cut and weed them. (If you are using stamps, practice your layout on paper before working on the stack to make sure your spacing is good before you start. Once you are happy with the layout, stamp away! Then, skip ahead to step 13.)
9. Arrange the stencils on your book stack and tape around the edges using the painters tape to avoid any overspray from the airbrush.

10. Grab your airbrush and add paint to the reservoir. Be sure to test your spray on a paper towel before you begin!
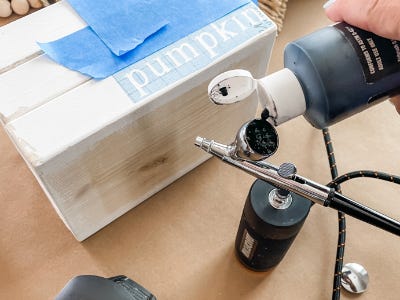
11. Using the airbrush, fill in the stencil carefully. Do multiple light passes instead of fully saturating to avoid any bleed through. If you do get some, that’s OK! Just touch it up with the white paint and a small detail brush.
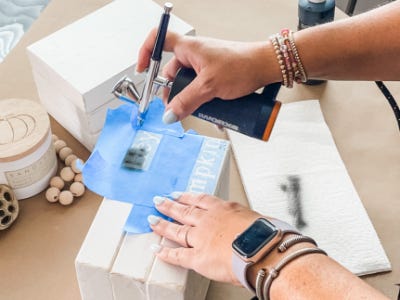
12. Allow the paint to dry a touch but not completely before removing your stencil.
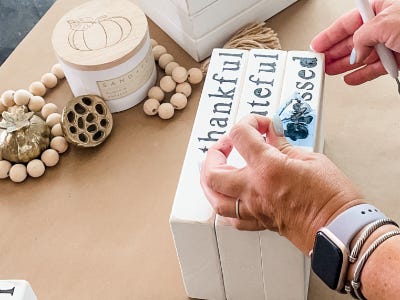
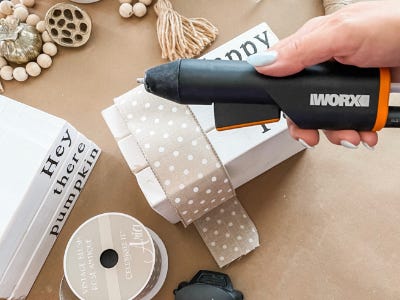
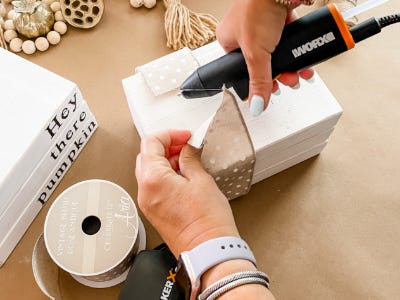
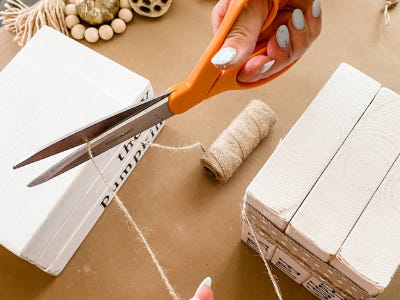
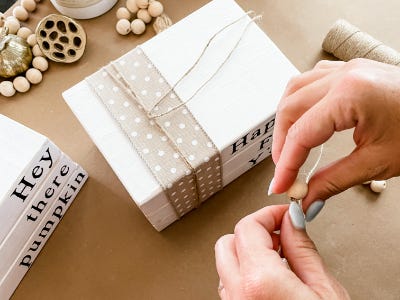
13. Now it’s time to decorate! Grab your ribbon and jute twine and wrap your stacks however you’d like. We used our MAKERX hot glue gun to secure the ribbon on the bottom of one and tied jute twine with wood beads and tassels to the others. Get creative here!
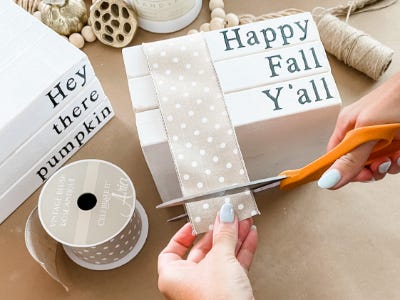
14. Tying the twine and adding the wood beads makes these Faux Book Stacks the perfect Fall decor for any home.
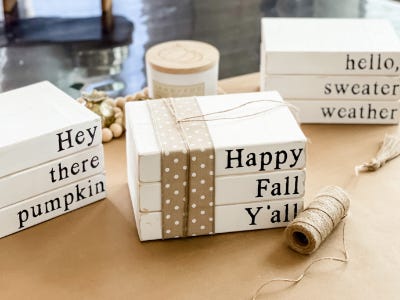

15. Now all that’s left to do is find that perfect spot to display your new creation. Happy Fall Y’all!