Intermediate
Halloween LED Creepy Candle

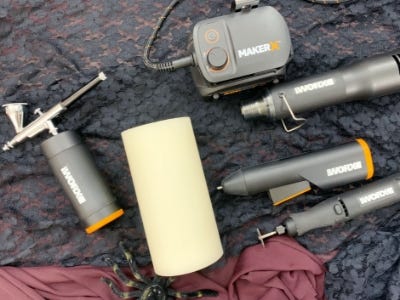
Supplies
- WX739L 20V MAKERX Rotary Tool
- WX742L.9 20V MAKERX Air Brush
- WX743L.9 20V MAKERX Mini Heat Gun
- WX746L.9 20V MAKERX Mini Glue Gun
-
LED Flameless Real Wax Battery Operated Candles
-
Glue Gun Sticks
-
Purple and Black Airbrush Paint
Tool Tip: Before airbrushing, test and practice on a scrap piece of paper or a paper towel and adjust the settings accordingly. Wear heat resistant gloves while using the heat gun and work in a well-ventilated area.
Step-by-Step Instructions
Steps
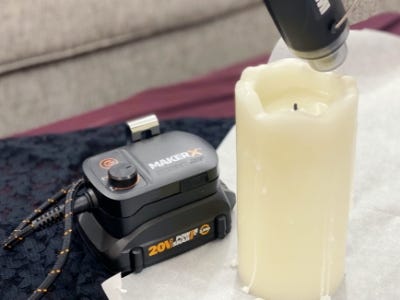
1. Carefully use the rotary tool to rough up and cut out groves along the top of each LED candle. Tip: Keep it uneven for an organic creepy look.

2. Wave the heat gun in a consistent motion about three to six inches away from the top of the candle. The heat gun will melt down and smooth out the rough cuts of the candle while starting to create a dripping effect. Tip: Use a piece of parchment paper to project your workspace.
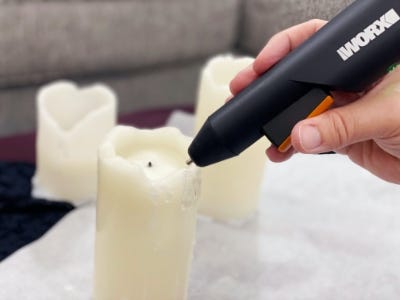
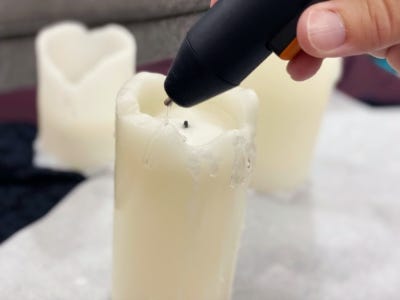
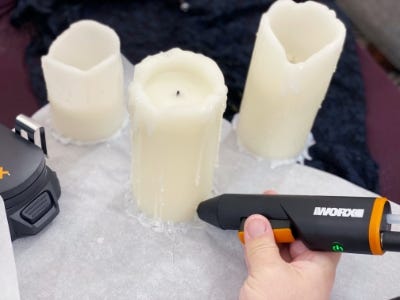
3. Use the glue gun to add more dramatic faux drips. Drip hot glue along the top of the candle as well as the base around the bottom of the candle until there’s more “wax” build up.
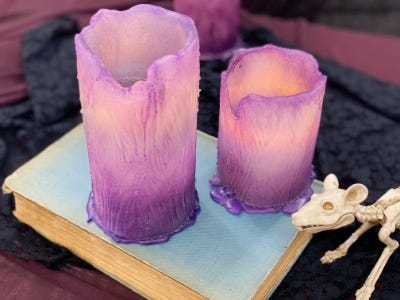
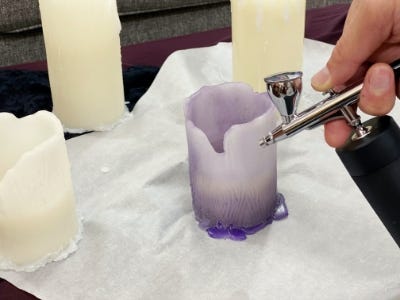
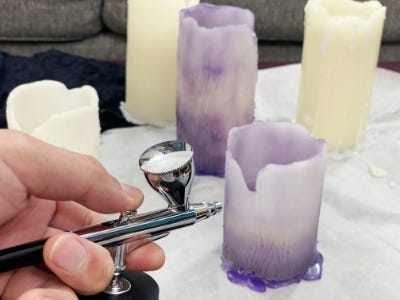
4. Fill the airbrush cup ⅓ of the way full with purple airbrush paint and lightly spray the outside of each candle. Once done, empty out the airbrush cup and fill withblack airbrush paint. Continue airbrushing light details on the outside of the candles until happy with the look. focusing on the edges of each cut.
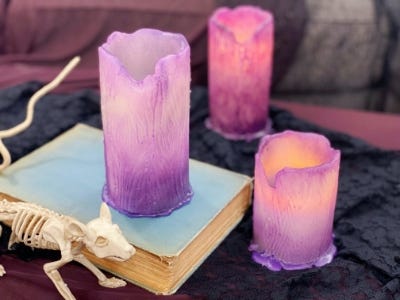
5. Haunt your home and watch it glow!