Advanced
Vintage Tailgate Toss DIY

Supplies
- Lumber: We used 1 2’x4’ piece of 5 ply plywood, 1 1”x4”x8’ and 1 1”x4”x6
- Tape Measurer
- Pencil
- Hammer
- Tack Nail
- String or Twine
- 1 ¾” screws
- 2 All Purpose Hinges
- Clean Rags
- Stain of your choice
- White Acrylic Paint
- Paintbrush
- Painters Tape
- Safety Goggles
Step-by-Step Instructions
Steps
1. Gather all of your supplies and get your workstation set up.

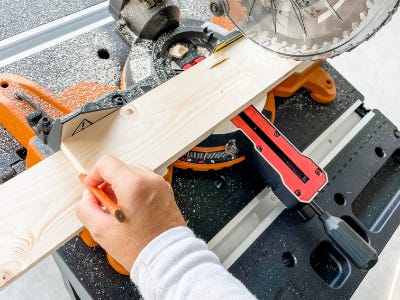
2. Power up your miter saw by loading a fully charged Worx 20v battery.

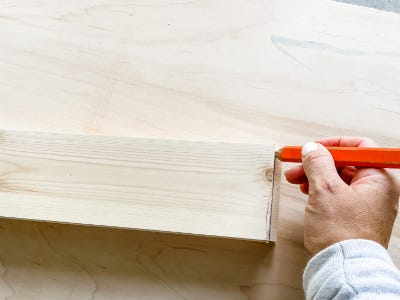
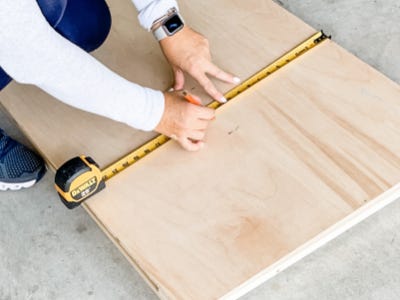
3. Measure the framing boards by matching them to the length and width of the plywood. Make cuts using the miter saw and double check by laying them out on top of the plywood board. We ended up with 2 4’ boards and 2 2’ boards for the frame.
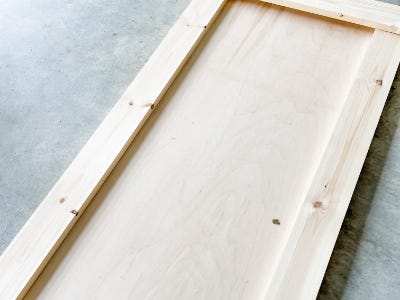
4. Assemble the frame using 2 screws in each corner at a diagonal.
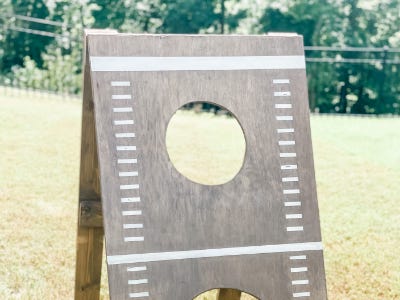
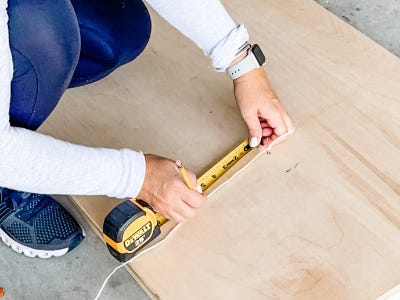
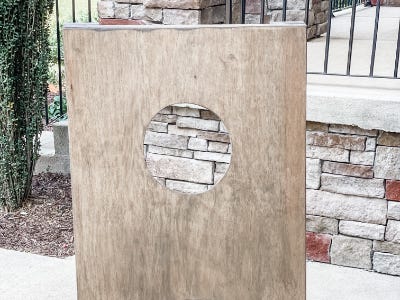
5. Next, measure and mark the center of each circle on your plywood board. We did an 8” circle and a 12” circle with the smaller one at the top. You can place your circles diagonally or even make more than 2 but we wanted to keep it simple.
6. Grab the hammer, nail, and pencil. Tack a nail in the center of your circle and tie the string onto the nail. Measure 4” out for the 8” circle and 6” out for the 12” circle. Now, tie the string to your pencil and make a circle. Repeat again for the second circle.

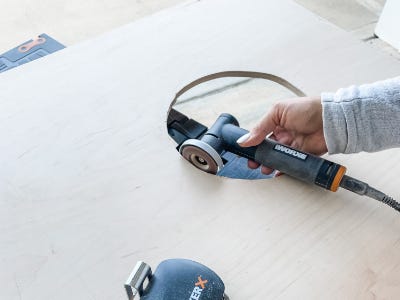
7. Once the circles have been marked, use the switchdriver to create a starting point for your jigsaw and then cut out the circles.

8. Now, grab the MakerX angle grinder with the sanding wheel attachment and use it to smooth the edges of each circle. We also used it to smooth out any rough edges around the plywood and the frame.
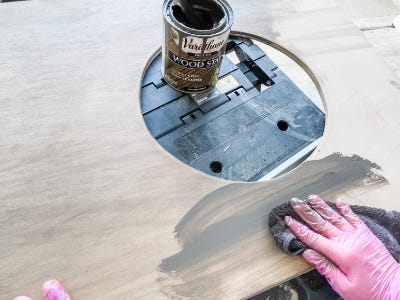
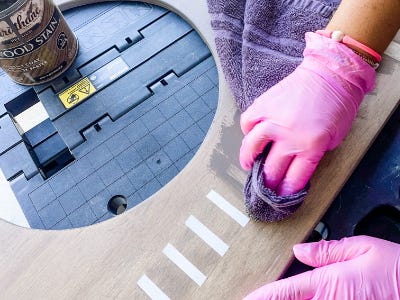
9. Next, wipe down your boards and stain them using a clean rag. (we used Briarsmoke by Varathane for this project)
10. At this point, you could stop and attach the frame leaving the board blank, but we wanted to add some hash marks to create a more vintage football vibe.
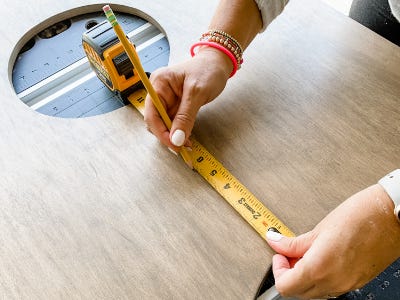
11. If you want to add the hash marks and lines, measure the center of the board for your “50 yard line” and mark with painters tape on either side of the line leaving a gap of about an inch. Then repeat with the “end zones.”
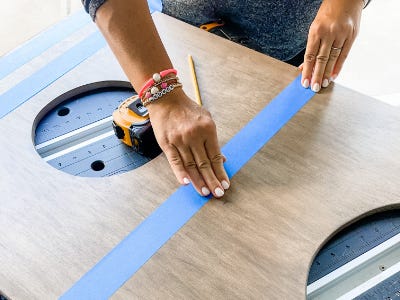
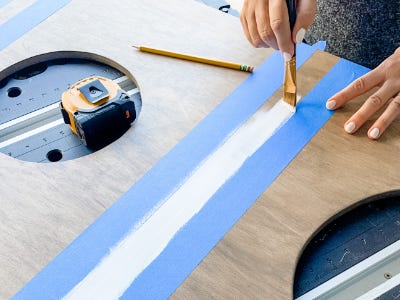
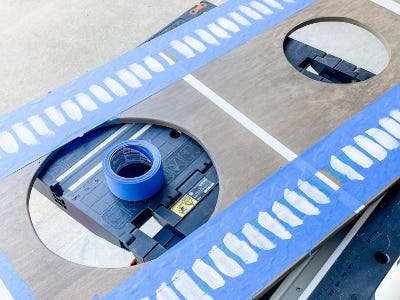
12. Using the white acrylic paint, fill in the lines between the tape. Add a second coat and remove the tape before it dries completely.
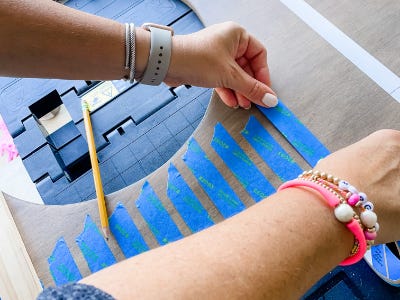
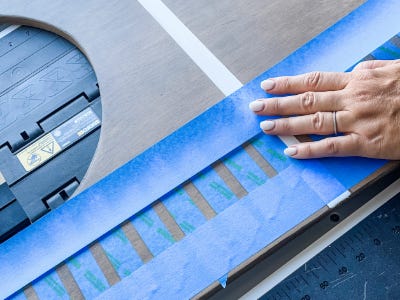
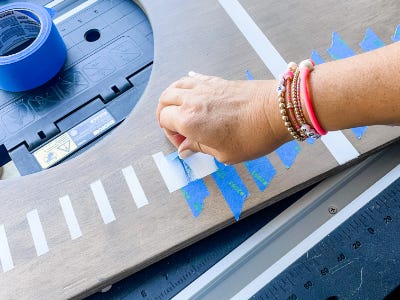
13. For the hash marks, I measured 4” from the edge and traced a piece of 2” painters tape across the board. After removing that tape, I was left with my guide. I used small pieces of 1” painters tape and starting from the bottom “end zone” applied tape added a space using a ½” board as a guide and marked with pencil on both sides before adding another piece of tape. Repeat this step until your entire “field” is marked with tape.
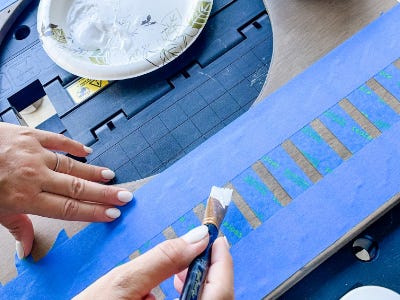
14. Then, fill in all the hash marks with the white acrylic paint. Apply a second coat before removing all the tape.
15. Since we wanted to create a vintage look to our board, we went over all of the white lines on the board with another layer of stain, even rubbing a little of the paint off in some areas.

16. Once the stain is dry, connect the hinges to the top of your board and the top of your frame.

17. Now, all that’s left to do is set it up and see how sharp your aim is! It’s a great tailgate game and easier to transport than cornhole. We even had a blast playing with the kids in the front yard while we had football on in the garage. Happy tailgating!