Intermediate
Creepy Smashed Pumpkin Halloween DIY
Supplies
- MAKERX Heat Gun WX743L.9
- MAKERX Rotary Tool WX739L
- MAKERX Air Brush WX742L.9
- MAKERX Mini Hot Glue Gun WX746L.9
- 20V Switchdriver 2-in-1 Drill/Driver WX176L
- Styrofoam Pumpkin
- Knife or Pumpkin Carving Tool
- Yellow, Orange, Black and Brown Airbrush Paint
- LED Flickering Light
Tool Tip:
Before airbrushing, test and practice on a scrap piece paper or glass and adjust the settings accordingly. Wear heat resistant gloves while using the heat gun and work in a well-ventilated area.
Step-by-Step Instructions
Steps
1. Use the rotary tool or a carving knife to carefully cut out the top lid of the pumpkin around the stem. Tip: Carve on an angle rather than using a straight up and down cut.
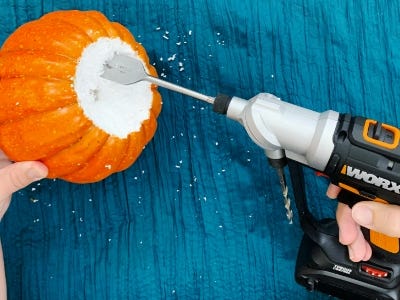
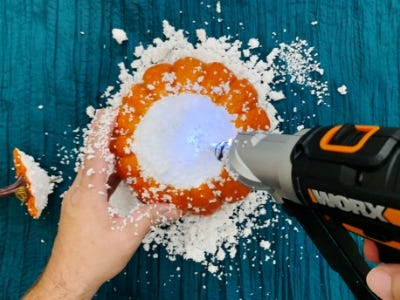
2. Scoop and hollow out the styrofoam inside of the pumpkin using the Power Share Drill. Tip: This step gets a bit messy! Think about saving and upcycling the drilled out styrofoam for another crafty project!
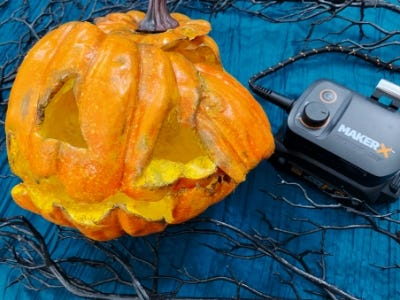
3. Sketch out a simple jack-o’-lantern face on the front of the pumpkin, then carve out each feature using the rotary tool or a serrated carving knife.
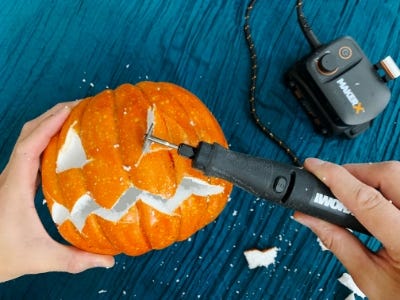
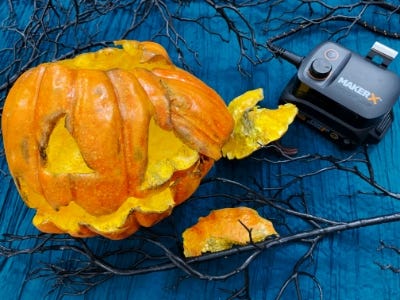
4. Cut out cracks around the eyes and mouth to help give the pumpkin a truly smashed look.
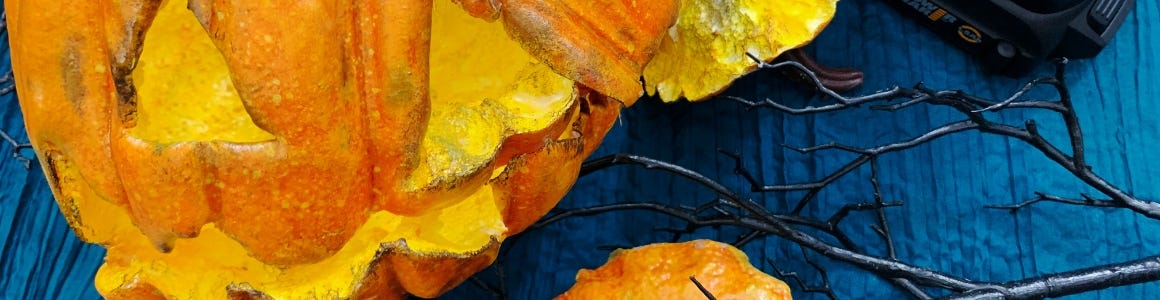
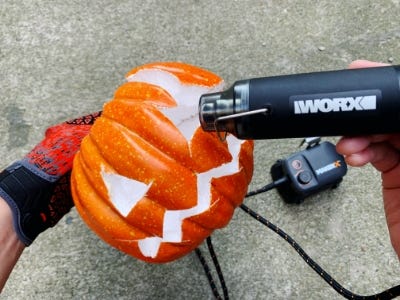
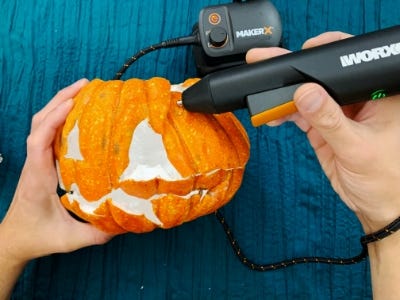
5. Wave the heat gun in a consistent motion about six inches away from the carved pumpkin. Doing this will melt down the styrofoam and curl any cut edges. Take your time with this step. It will truly give the pumpkin a rotted look. Tip: Work in a well ventilated area and wear a mask.
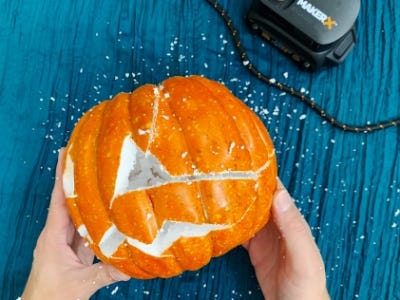
6. Help give the pumpkin a smashed shape by pressing down on the pumpkin and hot gluing any cracks together. Hold the glued cracks in place until the glue is completely dry. Continue until the shape is exactly as decrepit as you want it!
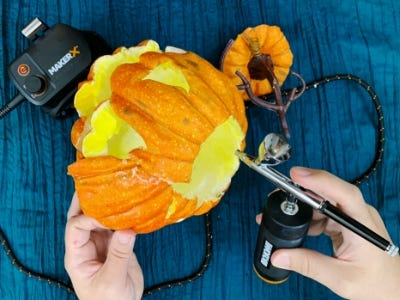
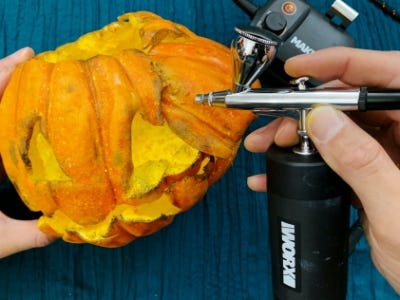
7. Fill the airbrush cup ⅓ of the way full with yellow airbrush paint and spray the inside and any white edges of the jack-o-lantern. Once done, empty out the airbrush cup and fill it with orange, brown or black airbrush paint. Continue airbrushing light details on the outside of the pumpkin focusing on the edges of each cut.
8. Add an LED light inside and enjoy your creepy macabre creation!