Intermediate
DIY Wooden Valentine's Postcards

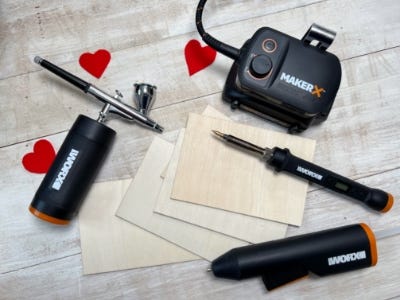
Supplies
- MAKERX Glue Gun (WX746L.9)
- MAKERX Wood and Metal Crafter (WX744L.9)
- MAKERX Air Brush (WX742L.9)
- 6"x4" Balsa Wood Sheets
- Vinyl Letters
- Magenta and Teal Airbrush Paint
- Ruler
- Felt
Step-by-Step Instructions
Steps
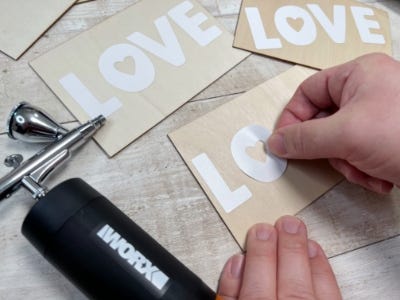
1. Use pre cut vinyl letters or a cutting machine to cut out the word “love”. Place the letters on one side of the balsa wood like a sticker. Make sure to press the edges down well so the paint doesn’t bleed.
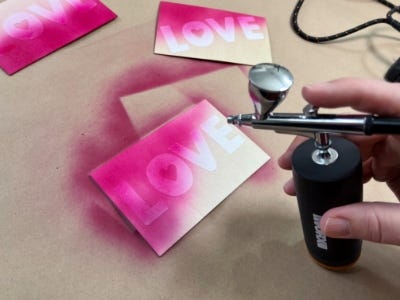
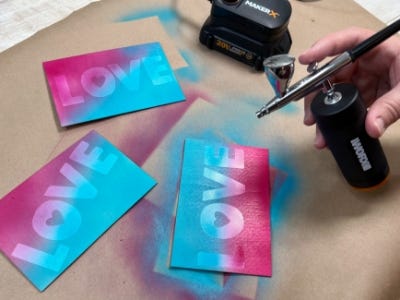
2. Lay a piece of paper on top of your surface to protect it while you’re working. Load the paint reservoir of the airbrush approximately ⅓ full with magenta airbrush paint. Before airbrushing the wood, test and practice on a scrap piece paper. Begin airbrushing on half of the postcard. Empty out the remaining paint and the teal airbrush paint into the reservoir. Spray it on a piece of scrap paper until the paint is the correct color and spray the other side of the postcard. Carefully peel off the stencil while the paint is still wet and let the paint fully dry before touching again.


3. On the backside of the postcard use a ruler and the wood crafter to measure out and create permanent lines. Measure out and burn a center vertical line that splits the postcard in half. On the right side, measure out and burn horizontal lines to indicate where the address should go.
4. Add a bit of texture by gluing pre cut felt hearts around the postcard.
5. Add to your Valentine’s Day decor or write a love message to send via snail mail!