Intermediate
DIY Welcome Sign
Supplies
- 6-8 inch Wood Circle Slices
- Cricut Vinyl Stencils or Standard Stencils
- Acrylic Paints
- Paintbrushes
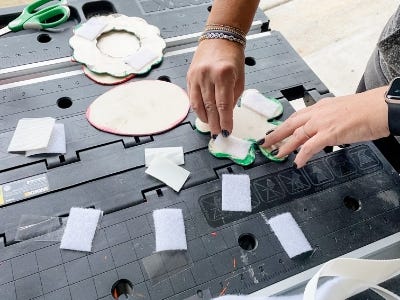
- Heavy Duty Velcro
- Scissors
- Painters Tape
- 1, 1x8x6 Piece of Pine
- Tape Measurer
- Spray Paint (Matte Black and White)
- Wood Stain (We used Briarsmoke)
- Clean Work Rags
Step-by-Step Instructions
Steps
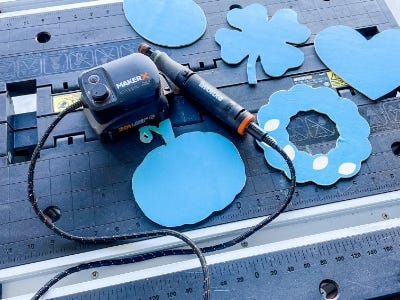
1. Start by setting up your worktable. (We just love our Worx Pegasus. It is so easy to set up and break down and is sturdy enough for big projects.) Grab the wood circles and your rotary tool too.

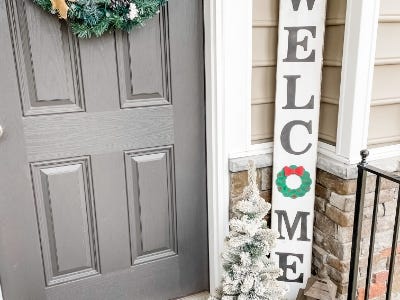
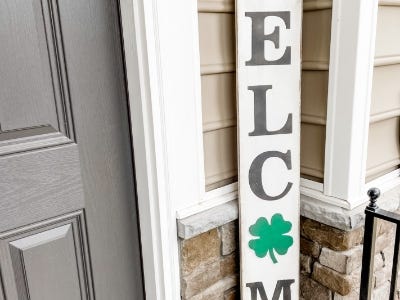
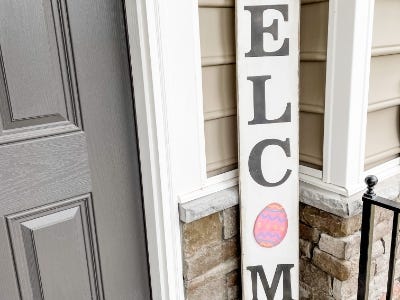
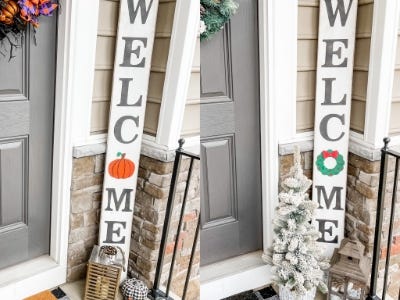
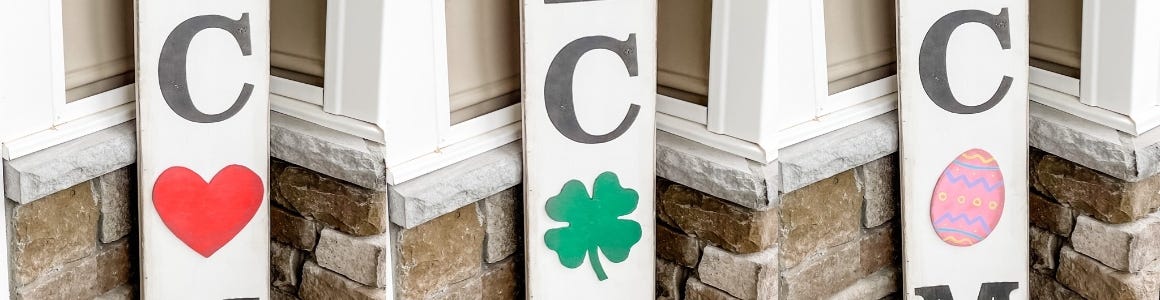
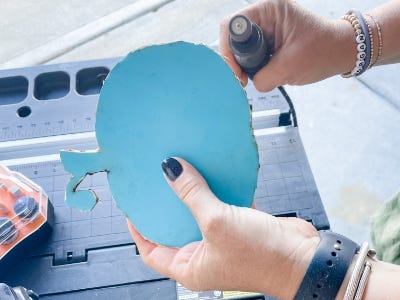
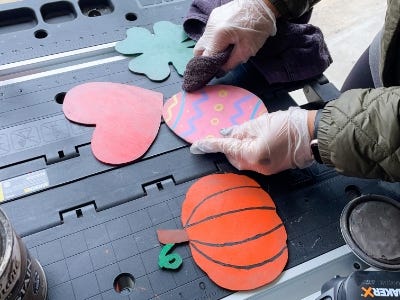
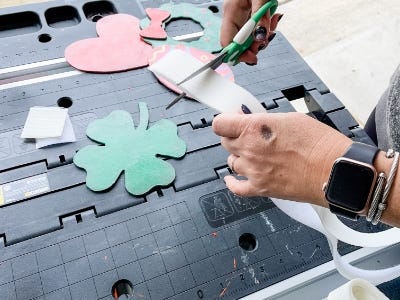
2. Attach your stencils to the circles. For this project we used a pumpkin, a holiday wreath, a heart, a shamrock and an Easter egg. If using a cricut to cut the stencils you can just peel and stick. We used the actual shape here, not the negative space like usual. You can trace around the stencil or just leave the vinyl stencil attached.

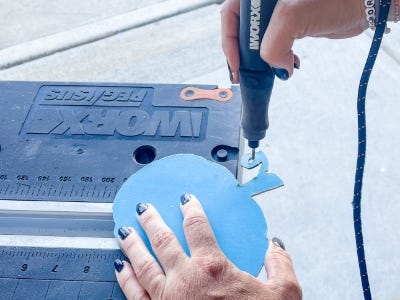
3. Using the cutting wheel on the rotary tool, power up the hub and carefully make your way around the edge of the design. This is a rough cut but try to get as close to the edge of the stencil as possible.
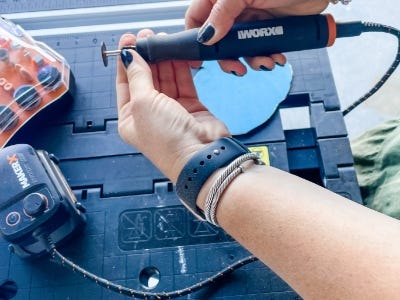

4. After the rough cuts are made, switch to the sanding tip and polish off those edges. You can also use the pointed tip to get in any small spaces. This worked really well for the pumpkin stem and detailing on our wreath.

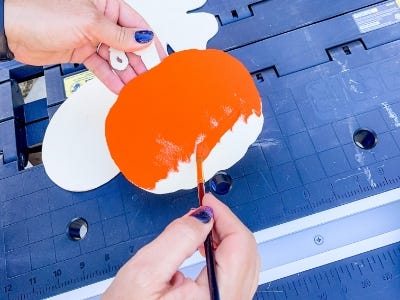
5. Once all of the shapes have been cut out and sanded, carefully remove your stencils.

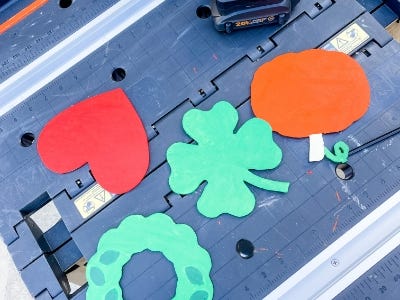
6. Now, paint the shapes using festive colors for each holiday. Get creative here!
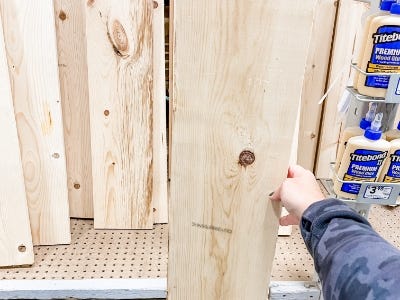
7. While the paint dries on your holiday shapes, grab your pine board and circular saw. Measure the length you'd like your sign to be and mark the board. Then cut the board to the desired length.


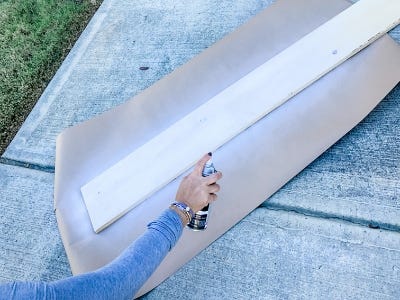
8. Next, spray paint the board using a matte white spray paint. Make sure to do multiple light coats until the board is completely covered.
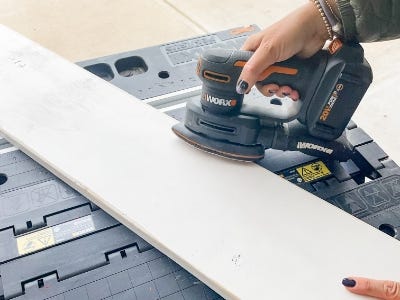
9. After the paint is completely dry, power up that Worx detail sander and rough up some of the edges to create a rustic, weathered look.
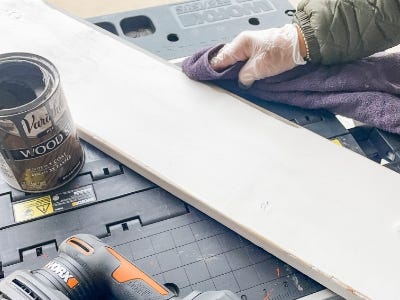
10. For an even more rustic look, you can stain those edges and gently rub down the tops and sides of the sign. We really liked how this weathering technique turned out!
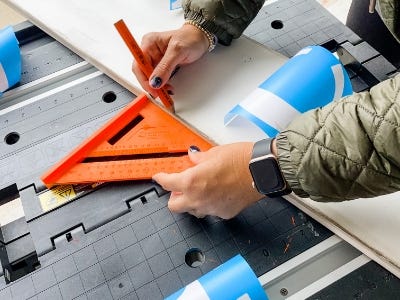
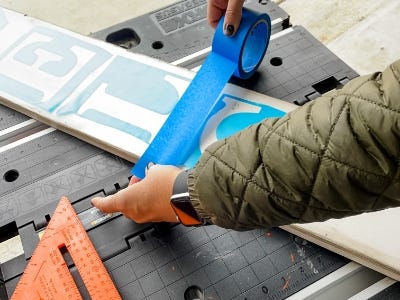
11. Once the sign is prepped and ready to go, get your letter stencils and tape measurer or triangle to mark the spacing for your greeting. We went with a classic “WELCOME” but feel free to make it say whatever you’d like. (as long as it can incorporate your interchangeable shapes.) Carefully lay out the stencils using your guides to be sure they are evenly spaced.

12. Apply painter’s tape around each stencil until the entirety of the sign is covered save the letter spaces. (Be sure to leave a space for the ‘O’ in welcome!)
13. Lightly spray the letters with the matte black spray paint. It is important to do this in multiple light coats to prevent any bleeding.
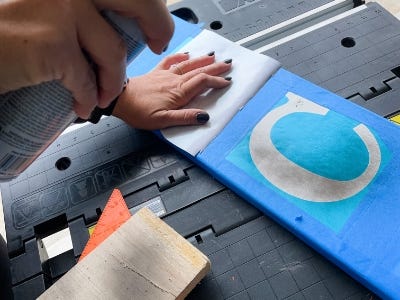
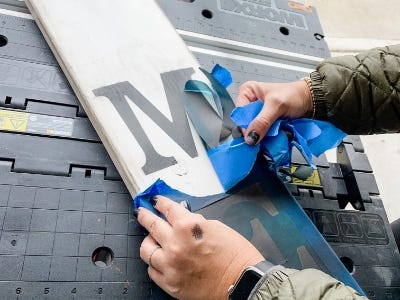
14. Once the paint is dry, carefully peel back your stencils to reveal your new sign!
15. At this point we realized that our brightly colored Holiday shapes clashed a little with our weathered sign so we decided to distress them as well. We did this by adding a little stain to each shape until they felt a little less bright.
16. Now it’s time to attach the velcro. We used an industrial strength self adhesive version but feel free to use whatever you find. Command strips would even work for this as long as you can easily change out your pieces.
17. Now all you’ve got to do is add your new creation to that front porch! It will be so fun to simply change out the accents with each Holiday!