Intermediate
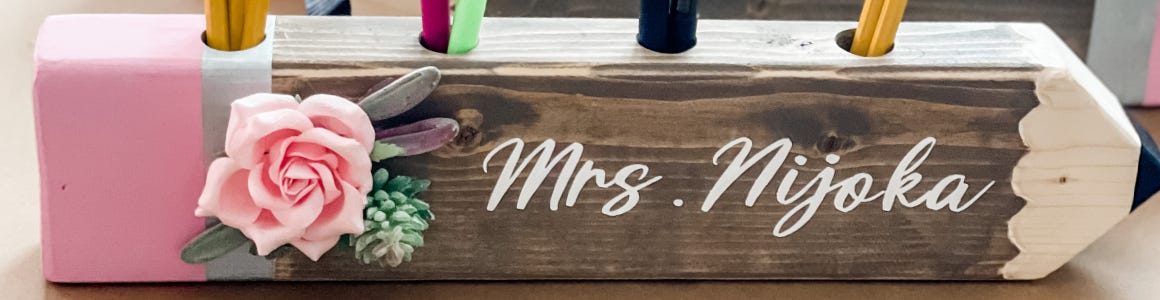
Personalized Wooden Pencil Holder
Supplies
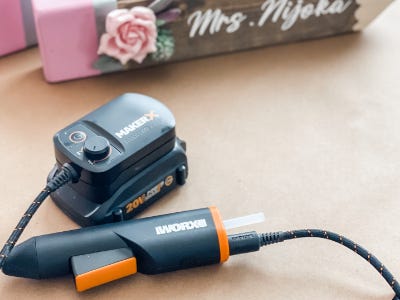
- MAKERX Glue Gun
- Worx Switchdriver 2 in 1 Cordless Drill and Driver
- 1 2x4x8 Pine Board
- Measuring Tape
- Ruler
- Pencil
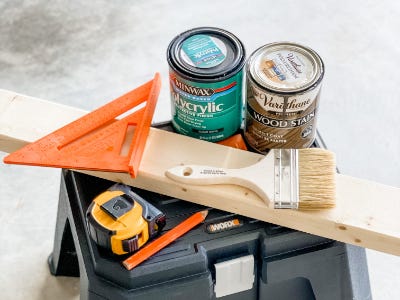
- Paintbrushes
- Stain
- Gloves
- Clean Rags
- Painter’s Rape
- Cricut Vinyl Stencil or Standard Letter Stencil
- Acrylic Paint (pink, gray, black)
- Paper Flowers or Faux Succulents
- Glue Sticks
Step-by-Step Instructions
Steps
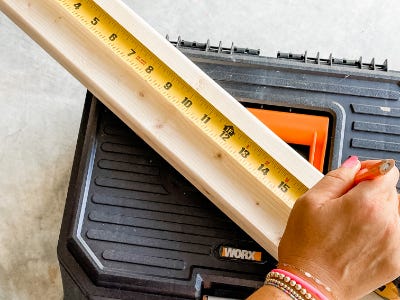
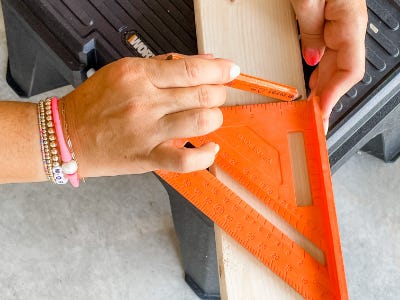
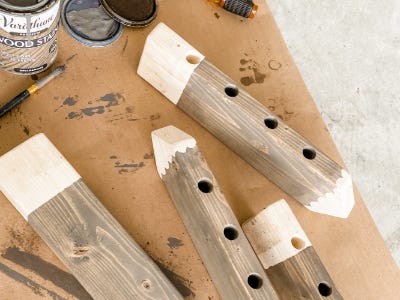
1. Start by measuring and marking your 2x4. We made our pencils 16” long to allow for at least 4 pencil holder holes in the top.
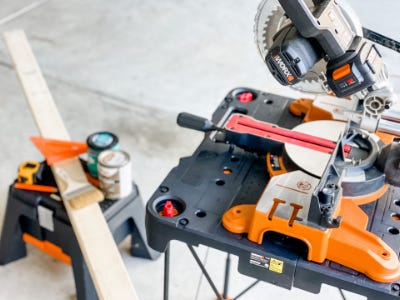
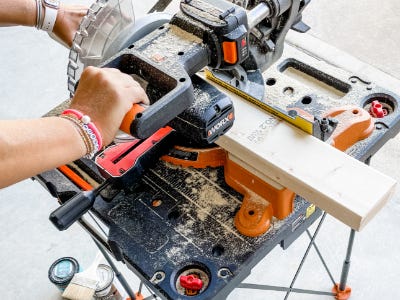
2. Using your Worx Miter Saw, cut your 16’ sections.
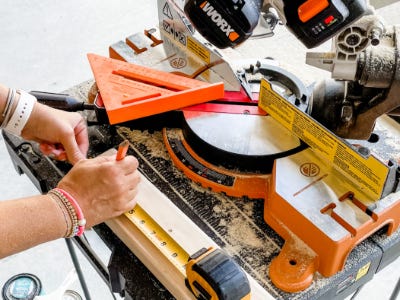
3. After each section has been cut, measure your angle cuts for the pointed end of your pencil starting at about 2” down from one end of the board and mark on both sides.
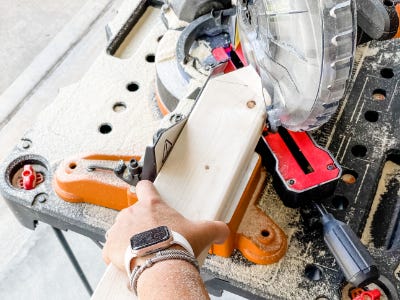
4. Set your Miter saw to 45 Degrees and cut starting from your 2” mark creating one half of your pencil point. Then flip the board over and repeat.
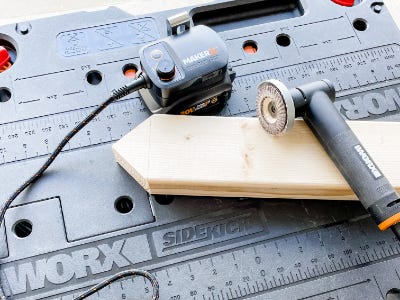
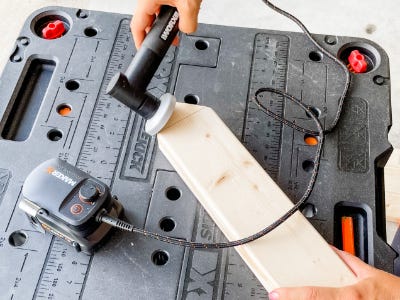
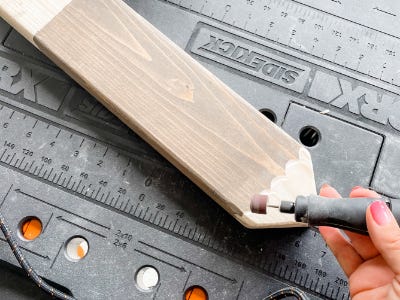
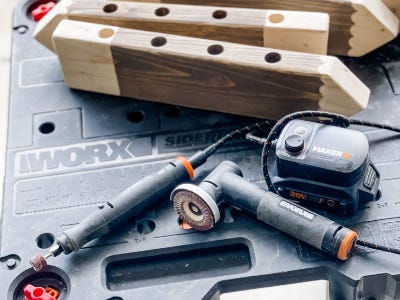
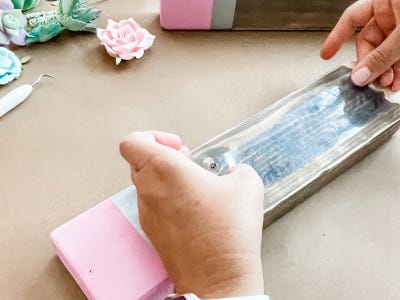
5. Now, power up your MakerX Angle Grinder with the sanding attachment and smooth out the edges of your pencil. (you can also use this to remove any leftover measuring marks you made on the wood)
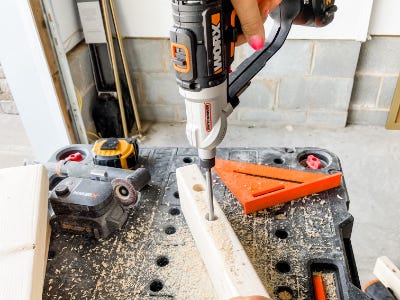
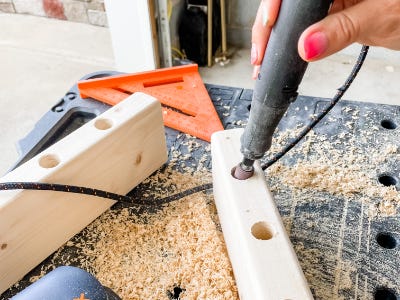
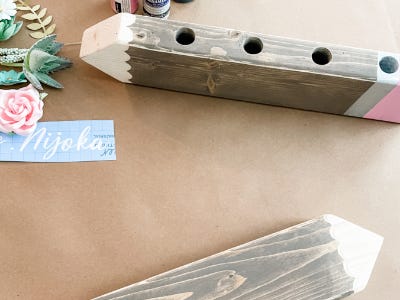
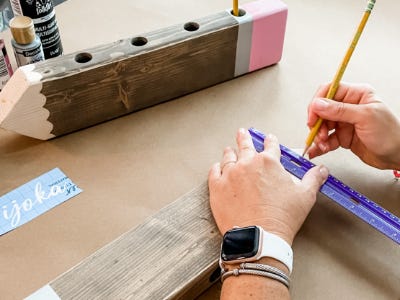
6. Once you've sanded all the edges, grab your ruler and mark your holes in the top edge of your board. We spaced them about 2 ¾ “ apart to create 4 evenly spaced holes. Then, using your Worx Tools Switchdriver with the ¾” woodboring spade drill attachment, drill each hole approximately halfway through. These will become the holes for your pencil holder.
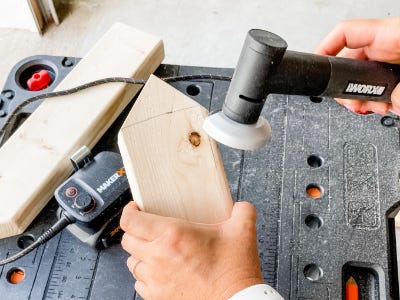
7. Grab your MakerX rotary tool with the sanding bit and smooth out the edges and insides of each hole.
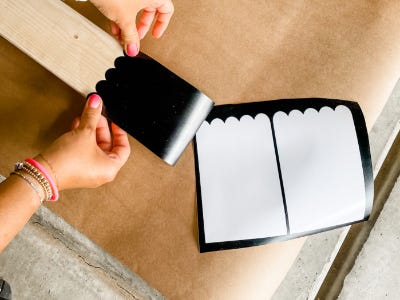
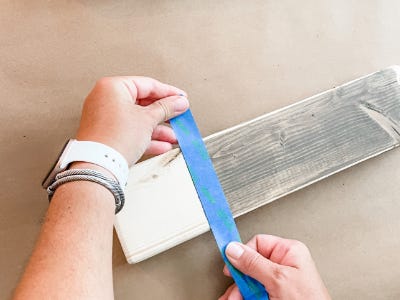
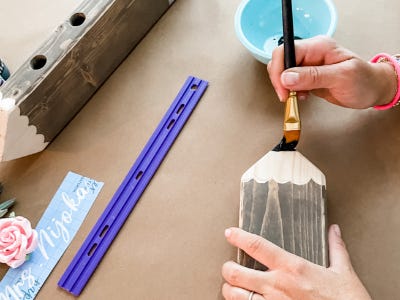
8. Wipe down the “pencil” with a clean rag to remove any sawdust and grab your stencils and painters tape. (we created a scallop edge vinyl stencil with our Cricut, but you can use a standard stencil or create one of your own by drawing the pattern onto some tape.
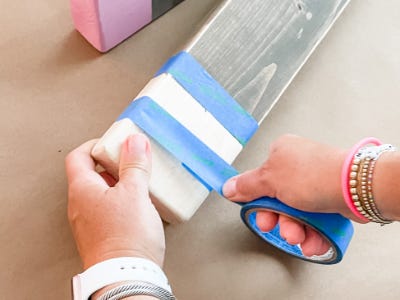
9. Next, apply your scallop stencil to the tip of your “pencil” and a strip of tape to the other side over the last hole.
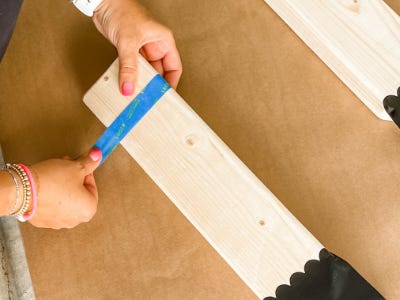
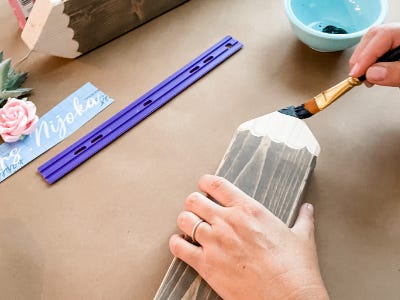
10. Using the paintbrush and a clean rag, stain each “pencil” between the stencils being careful not to oversaturate near the edges to prevent the stain from bleeding under. Continue all the way around the board, moving the scallop edge as you go until the entire middle surface is stained to your liking. ( Be sure to get the stain all the way down into the holes! ) Remove the tape and stencils and allow the “pencils” to dry.
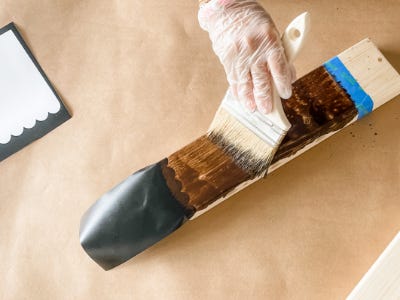
11. As an optional extra, we decided to add a little detail on the scalloped edge by using the MakerX rotary tool sander to carve out little scalloped grooves along the unstained edge of the pencil point. This technique removed any signs of “bleeding” and gave a little added charm to the design.
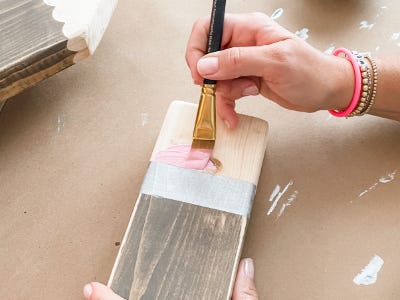
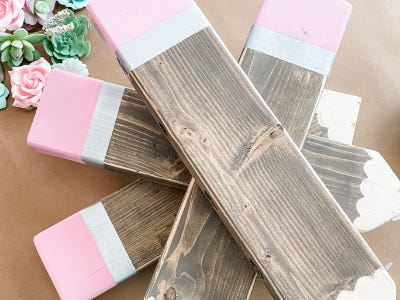
12. After cleaning up your workspace and removing any residual dust from your boards, grab your painters tape and acrylic paints and tape around the straight edge of your stain. Then, add another strip about an inch away from the first and paint this section with your gray/silver paint. (the kiddos really love helping with this part!)
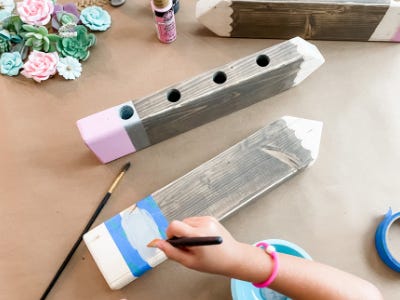
13. Once the gray paint has dried, paint the rest of the edge pink. (We free handed this part but feel free to tape it off if you need to.)
14. Next, take the ruler and create your pencil point by marking a straight line across and around the tip of your pencil. (approximately ¼ to ½ inch depending on your preference.)
15. Using the black paint, paint the tip of your pencil following the straight line around the board.
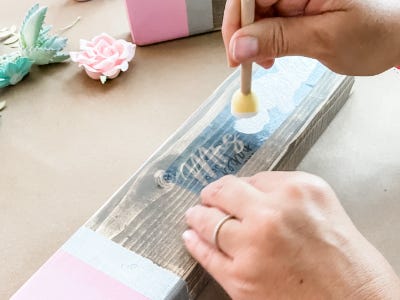
16. While the paint dries, create or arrange the stencil you would like to add to the front. (This is optional but creates a special personalized touch.) We used our Cricut to make a stencil with my daughter’s Teacher’s name but you can use standard letter stencils for this too!
17. Arrange your stencil centered on the front of your pencil and secure with tape if needed.
18. Now, grab the white paint and a stencil brush or sponge and fill in the design. Apply as many coats as needed to create an opaque effect.
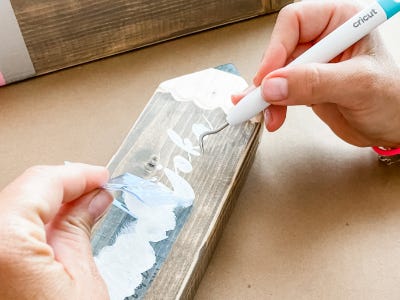
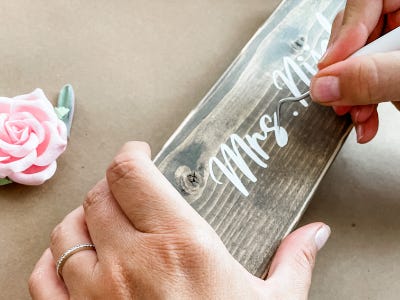
19. Remove your stencil carefully and allow the paint to dry.
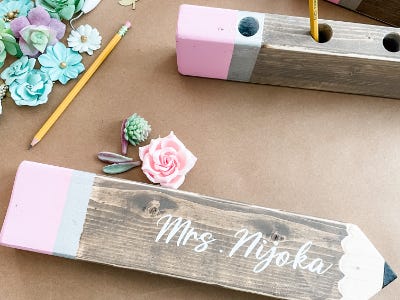
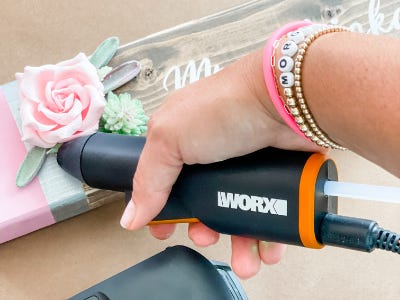
20. Select the accents you’d like to add and arrange them onto the pencil while powering up your MakerX Cordless Glue Gun. Then, glue the flowers or succulents down at the edge of the “eraser.” These are also optional but we loved the sweet accent they added to the piece.
21. All that’s left to do is add some pens and pencils and surprise your favorite teacher with this thoughtful handmade gift!


